Display to Laboratory for Microsoft Access. Report on laboratory work on the control system
Introduction Access is one of the database database management systems (DBMS). Database (DB) stores a set of data and objects related to a specific task. It helps us streamline information and allows you to quickly make a sample. As data can be any information stored on a computer disk: combinations of characters, words, files, pictures, etc. Methods of entering and storing data define the database structure.
 All objects of the base access dataIn addition to macros and modules, you can display in two modes: in the table mode and constructor mode. Constructor mode in DBMS Access Designer mode provides great opportunities when creating a table, query, form or report. For example, in this mode, you can set the width of each field in order to make the object more compact. Table Mode In ACCESS DBMS In Table Mode, you can add, edit, view or perform another job with table data. Each table string is a separate entry, each column - field.
 Creating tables in the constructor mode by opening the table in the "Designer" mode, you can make the following steps with it: Enter field names, set the type and property when creating a table, change the field characteristics, add fields, delete fields. The window consists of two parts. Top part called a blank. In the form you can enter the name of the field, its type and description. In the field properties, more detailed characteristics are indicated, such as: size, format, signature, field binding. If the key is key, then in the properties it is indicated that it is indexed.


 Creating a table in the mode of the wizard on the passage of all stages of creating a table, in the Master mode, it will take the form:
 Installing links Created tables to simplify the design of multi-clock forms, queries and reports must be connected. This connection is provided by the data scheme that is determined by the information technology model of the subject area.
 Requests in a modern DBMS near the simplest means of searching and filtering data are used convenient, flexible and powerful tools - requests. With their help, you can execute calculations, update the data in the tables, add or delete records. In this case, the results of the execution of the query are fed in a convenient form - in the form of a table. The request can be built using a temporary table created using another query. Requests are: to a sample, to create a table, on an update, add to deletion.
 Creating a request to select a selection request, i.e. selecting data from interrelated tables and other requests. As a result, they receive a table that exists before closing the request. Table with the results of the Za Rosachean use to work with the data of the tables on which the request was built;
 Request for creating a table request to create a table based on a selection request, but unlike the last result of this request is saved in the new table
 A deletion request provides removal of records from one or more related tables. The question is irreversible, so it is necessary to have a copy of the table that is used.
 The update request makes it possible to make changes to a group of records that are selected using a selection request, i.e. to a new table created by the query.
 Request for updating when performing this request Appear dialog boxes As a request to enter the necessary values \u200b\u200bfor the parameter.
 Grouping Data After selecting in the contextual independent menu, the group operations group operations in the query form will appear the group operation, where you need to select the necessary one from the list of special functions.

 Cross request This request is created using a wizard that is launched by selecting the appropriate command in the New Request dialog box. The wizard creates a table in which the left column forms the headers of the rows from the values \u200b\u200bof one selected table field, the upper line forms the column headers from the values \u200b\u200bof another table field, and at the intersection of rows and columns are the total values \u200b\u200bcalculated by the values \u200b\u200bof the third field. To get the final values, a grouping is performed by fields. In addition, the cross query can be created using the designer. At the same time, you first create a selection request, and then it is converted into a cross request.

 Forms The basis of the user dialogue with the database is a form, the design of which is determined by the user. It is indicated from which tables and the contents of which fields should be displayed, which graphic elements should be included in the form.
 Creating a designer working field in the constructor is a form consisting of three areas: "Mold Title", "Data Area" and "Form Note". To accommodate in the areas of the desired objects, it is necessary to use elements from the toolbars. After towing the desired fields from the table in the "Data Area", forming and inclusion in the form of certain controls, the Form Designer dialog box will take the view submitted by side.
 Creating buttons on the form first on the "Toolbar" you need to select the "button" object and place it on the form. Then follow the prompts on the screen and create the desired button.
 The completion of the constructing of the final form constructing operation is to save it as part of the database. To view the form, you must open the database, click on the "Form" tab, select the desired and execute the Open command. As a result, the desired form will be displayed on the screen.
 Multi-page MS Access tools allows us to design multi-page forms that contain multiple tabs. Before creating this form, a selection request was designed, which became the basis of creating a form. Such a form is created using a designer.

 The conclusions during the implementation of this laboratory work were studied and acquired skills to work with MS Access DBMS. It was studied to create in various modes and editing tables, requests, forms and reports. The work promised gave confidence in the computer and opened the possibility of using Microsoft Access database management systems, which may be useful in further improvement, as a professional, as well as in a future profession to simplify and systematize work with data.
Subject:
Database creation.
Building a table in the database.
Purpose of work:
Teach to form a table structure, enter and edit data, determine the key to bind two tables.
Completing of the work:
Basic Structural Document in Access is an table. Each table contains recording divided species, such as students. Each table entry contains all the necessary information about a separate database element.
On the basis of the tables, the formation of forms, reports and queries is carried out.
The database may include multiple tables.
In the open database window, click on the tab. "Tables" And click the button "Create".
Select in the list of dialog box "New Table" Method for creating a table:
Table mode - creating a table in table mode;
Constructor - creating a table using a table constructor;
Master tables - creating a table using a table wizard;
Import tables - creating a table by importing data from an external file or other database;

Create a table with the help Designer.Select in the window "Designer"and press " OK ".
In the fields dropped, enter the name of the fields, select the data type and define the properties of the fields.

In a collumn Field name War names are set:
1. Number; 5. Paul;
2. Surname; 6. Date of birth;
3. Name; 7. Group;
4. Patronymic;
The table should not be two fields with the same name.
For each field included in the entry, you should specify data type.
Data type Determines the type of information that will be stored in this field. The data type is selected in the column Data type .
Defaultinstalled data type Text.
To change the data type, you need to click in one of the column cells. Data type . A list button appears on the right side of the cell, when you click on which a list with available data types will open.
In a column Descriptionyou can arbitrarily enter comments on each field. This operation is optional.
Setting field characteristics must be performed sequentially, i.e. For each field first you need to enter the name, then the data type and, if necessary, comment.
To go to the desired cell, you can use the mouse, keyTab. And at the end of the input you can press the key ENTER .
Black triangle In the marking column, the left indicates that line in which the cursor is located.
After defining all the fields of the table, specify one field for use as a primary key field. This will not allow you to enter repeating records to the table.
Primary key Can be defined only in table constructor mode.
In this table, the primary key field will declare the field" Room ".
For this you need:
select the field " Room " or just put the cursor there;
press the button Key field on the standard toolbar with the key image or
menu "Edit" "key field"
FROM 
lev Ot this field A small key image appears - a sign of the primary key field.
Key field
The table specification prepared in the design should be saved because it will be based on the entire table.
For this you need:
menu "File" "Save"
If the table is saved for the first time, the dialog displays the screen
window " Preservation ". In this window you need to enter the name of the table.STUDENT .

Entering and editing data in table mode.
In the created table, data can be entered as directly in tabular form By default, and using a specially designed custom screen form. Editing records and correcting errors in the table data is also possible in each of the two modes.
To enter data in the table you need to open the database.
In the database window, click on the table name STUDENT .
IN 
The window that opens appears a blank table for data entry.
Along the top edge of the window are located table fields.
Each field corresponds to a specific column in the table.
Each entry takes one line in the table.
Entering data into the table of the table is carried out from the keyboard. When entering data entering the last Access entry field himself goes to the first field new recording And expects data entry.

After entering the data, the table must be closed.
To do this, enter twice the command
menu "File" "Close"
Ministry of Education and Science of the Russian Federation
Moscow State Institute of Electronics and Mathematics
(Technical University)
Department of Computing Technology
by laboratory work №7
« Microsoft. Office. .
Database Management System
Access.»
Student: Malofeev S.A. C-12
Lecturer: V. V.S.
Moscow 2008
Performed the theory:
Basics
Databases and database management systems (DBMS)
B.aza D.annos (DB) are designed to store on a computer and efficient use of large volumes of the most varied information:
about books, magazines and newspapers in libraries,
about goods in stores and products on factories,
about exhibits in museums and a variety of collections,
about all employees of firms, enterprises and institutions,
about all flights of airports at airports, ticket prices and availability,
about the schedule of all trains from stations, about the cost of tickets and availability,
about all cars registered in the traffic police (traffic police), including stolen,
about all vouchers, including "burning", in the turbo and travel agencies,
weather at any point of the globe now and many years ago, etc.
All DBMS, including DBMS Access allow:
Quickly create databases, complement and change them.
Quickly find certain data you need in the database.
Sort the data in the database on different features (for example, alphabetically).
Extract data subsensus on your requests, i.e. satisfying a given criterion.
Perform statistical calculations on database data for analysis and decision making.
Print data selected for certain purposes, i.e. Prepare certificates, reports, etc.
Like Excel tables, the database tables consist of their columns and lines. At the same time, the columns in the database are called " Fields"And they have specific names
(names " Fields "), not the letters of the Latin alphabet as a name as in Excel tables. Such columns, i.e. The fields in the database tables can be up to 255 (as in Excel).
Each line in the database tables is called " Record"And has a sequence number, the same as the string in the EXCEL spreadsheet. The number of rows, i.e. entries in the database tables is practically unlimited.
Everything " Entries"(lines) in the database table contains in each cell necessarily the same type of information corresponding to the name" Fields. This is the main difference between the database table from the EXCEL spreadsheet. For example, in a column with the field name " FULL NAME" (see the database table " Student "On the next page) in all records (i.e. in all rows), you will see specific names of people;
in the column with the field name " Year"In all records (i.e. in all rows) you will see concrete birth of students;
in the column with the field name " NG"In all records (i.e., in all rows) you will see concrete students of students.
The database may include not one, but several related tables. Besides Tables - The main object of the database - the database may contain other objects, namely:
Form (one or more). The form is a way to display on the data screen from the database tables convenient for data entry and to view them.
Inquiry (one or more). The query is a way to choose and output on screen Data from the database tables at the criteria specified.
Report (one or more). The report is a way to choose and printing
Macro (one or more). Macro is a set of macros performing certain operations with databases, for example, printing reports.
Module (one or more). The module is a program in the ACCESS BASIC programming language used in the database to perform non-trivial tasks.
All listed objects, if they were created, are part of the database file having an extension . mDB..
You will learn Access 2000 - last version Programs, but it differs little from the version of Access 97, so both versions are currently used.
This practical work Let you master all the basic operations of creating, changing and using databases regardless of the version of the Access that you use.
Runway DBMS Access
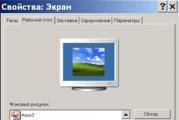
The appearance of the screen after starting the Windows operating system may be the most different, but always on the monitor screen (your desktop) there are many program icons, files and folders, and at the bottom of the taskbar (a narrow strip at the bottom of the screen with the button) Start.
If somewhere on the screen is the icon access programs, Install the mouse pointer to it and double-click on the calculation of this program.
If there is no Access program icon on the screen, then click on the Start button. Open the main menu of the system, select "Programs", and then in the second menu by clicking on the "Microsoft Access" item on the "Microsoft Access" item to calculate this program.
The Windows typical program window opens with the "Microsoft Access" header, and in it (Fig. 1):
Dialogue Microsoft window Access to create a new database or opening already existing.
Line menu under the header line (file editing view insert service service window Help),
The standard toolbar under the menu bar, which turns on and turns off the "Toolbar" command in the View menu. All tools have a "label" that appears automatically when overlaying the mouse arrow tool.
The status bar of the program at the bottom of the window. It will appear current information about your database and about Access mode.
Theory: Creating and using databases
Data
Most effective method Using the database is the creation " Requests ". Inquiry - This is a way to choose and output to the data screen from the database tables at the criteria specified.Theory: Creating and Using Reports in Databases
Besides " Tables", "Form"And" Requests"The database file may contain one or more" Reports". "Report "Is a way to choose and printing Data from database tables in the form in which they are required to the user, i.e. You.Theory: Creating a Database Scheme - 3rd Stage
Creating a database schema is the definition of ties between tables included in this database, or rather, between the specific fields of these tables.
When tables are connected - changes in one of them are automatically transmitted to another. The main meaning of the binding of the tables is to eliminate the duplication of information in the database.
The easiest way to understand the meaning of links on the example of the specific database that you create, i.e. Educational process. The circuit of the links of this database is shown in Fig. 3.
In the window Educational process: Database Press the button Data scheme On the toolbar. In the window that opens Adding a table, Choose the bookmark Tables and by pressing the button Add, post in the window Data scheme All tables. Then press the button Close. As a result in the window Data schemeall database tables will be presented. Educational process with lists of their fields.
Fig. 3. Data circuit DB Educational process
Communications should be installed with empty tables, otherwise the problems of coordination of the properties of connections may arise.
Theory: Creating and using reports in databases.
Development of multi-job reports
Along with one-bit onecourse reports Access Allows you to create its complex reports that provide data output from several interconnected database tables. To display interconnected data into a multi-job report, the required links are set automatically in accordance with the data scheme.
Multi-flash reports may contain the main part and the included part, i.e. the subordinate report. Each of these parts is based on its table.
Multi-flash reports can also, having fields from different tables, do not require inclusion of subordinate reports.
Consider the construction of a report for tables located in single-multi-valued relationships. In this relationship, one table is the main one, and the other subordinate. Building such a report has its own characteristics, depending on the choice of the main or subordinate table as the basis of the report.
Exercise 31. Multi-clock report with the main part of the main table

Fig. nineteen. Department Report Layout
Consider the technology of creating a multi-clock report on the example of the tables Department and teacher. Let it be necessary to prepare a report containing information about the departments, including the lists of teachers.
In tabular part of each department, you must display a list of teachers. Such data can be obtained from the table. Teacher.The proposed layout gives the base to choose as the main report table table Department, and table TagVitel - as a data source for subordinate form with a list of teachers.
Layout report. Suppose that the layout for the report with the lists of teachers in the departments must be viewed in Fig. 19. In accordance with the project of the layout, the report assumes data for each department, including the name, code and phone, as well as the name and photograph of the head. This data is contained in the table. Department.
Performed exercises:
Exercise 1. Creating the simplest database in the form of one table

Exercise 2. Changing the width of the columns "mouse" or the "Column Width" command in the "Format" menu

Exercise 3. "Insert" and "Delete" fields, as well as changing the order of "fields" (columns) in the table.
Exercise 4. Inserting a new field with "Photos" of workers

Exercise 5. Entering new data into the table, editing and deleting records
Exercise 6. Data sorting in the database table
Exercise 7. Search for signs of the sample in large database tables and search for the contents of a specific field

Exercise 8. Creating and using a new bd object - "Request".

Exercise 9. Creating and using a "query with parameter".

Exercise 10. Creating a new object in the database - "Forms".

Exercise 11. Creating and using the new bd object - "Report".
Exercise 12. Creating a report with a query-based parameter with a parameter
Exercise 13. Construction of the "Group" table in "Table" mode
Exercise 14. Designing Table "Teachers" in Master
Exercise 15. Construction of the Table "Department" in the "Designer" mode
Exercise 16. Designing "Study" and "Study" tables in "Designer" mode
Exercise 17. Establishing links between database tables.

Exercise 18. Deleting communication between tables
Exercise 19. Entering data directly to the "Specialty" table, "teachers" and "group"
Exercise 20. Forming a query in the "Designer" mode

Exercise 21. Preparation for the creation of the composite form "List of student groups"
Exercise 22. Creating a form for two tables using a wizard
Exercise 23. Selection of type of form
Exercise 24. Appointment of the name of the form and its opening

Exercise 25. Editing form in constructor mode

Exercise 26. Editing subordinate form
Exercise 27. Switch to form mode and table download
Exercise 28. Multi-job report with the main part based on the main table
Exercise 29. Creating the main part of the report
Exercise 30. Creating auto detection.
Exercise 31. Refinement of the subordinate report
Exercise 32. Enabling the subordinate report.
Report on the execution of the test task:
Database:

Filling the database tables.


Creating bonds in the database:

Laboratory work number27
Topic: Working with data and Create reports in DBMS ACCESS
purpose of work- Study of the methods of developing and printing reports in the ACCESS 2007 environment.
Equipment: PC, Windows XP Professional, MS Access.
The task:
1 Examine the appointment and ways to develop reports in Access.
2 Develop reports in accordance with the task.
3 Reply to test questions.
4 Make a conclusion about the work done
Procedure:
1 In the Database Database window, run the command: Tab Tab Creating - Report Toolbar - Report Wizard.
2 Select the table (or query) from the list, which will be used as a data source (for example, customer address request).
3 In the Create Reports dialog box that appears, move all available fields In the "Selected Fields" area.
4 Using the report wizard, create a report of birthdays. As a data source, use the Table Employees.
5 If you want to print postal stickers, Access provides such an opportunity. To do this, highlight the clients table and execute the command: Tab Tab Creating - Toolbar Reports - Stickers.
6 In the dialog box that appears, specify the size of the stickers, the units system, sticker type and click Next.
7 In the next step of creating a report, install the font, size, text color and stacking. Click "Next.
8 Select fields that will be placed on the sticker. For example, company name, address, telephone and fax. If each sticker needs to withdraw a specific text, then enter it into the prototype sticker.
9 If necessary, change the name of the report with stickers and click Finish.
10 Sometimes in the reports you need to calculate the total values, the average, minimum, or maximum value, as well as interest. To do this, run the report wizard and as a source of the data specify the request to the order amount.
11 In the wizard dialog box, which sets the order sorting order, click the Results button.
12 In the Results dialog box, select the checkboxes in the SUM column dialog box to calculate the final amount.
14 Create a birthday report using the birthdays as a data source.
15 Make a report made orders in which there will be data about the company and the amount of the order. Calculate the final amount, the average value (AVG) and the maximum amount for each company.
16 Show work as a teacher.
17 Answer control questions.
18 Make a conclusion about the work done.
Control questions:
1 What are the reports for?
2 What ways to create reports do you know?
4 What outcomes can be calculated in the reports?
5 How to print postal stickers in Access?
Introduction to Access.
We will look at the possibilities of Access and types of tasks that can be solved with this DBMS. In particular:
Access - database management system (DBMS).
Using Access for storing and searching for data, presenting information in a convenient form and automating the execution of repeating tasks.
Developing using Access of simple and convenient forms of data entry, data processing and generating complicated reports.
Application ACCESS 97 for placement forms Access as hTML documents On Web pages and data exchange with Internet / Intranet nodes.
Support in the Access Sample Query Mechanism (QBEEXAMPLE - QBE), providing a sample, sorting and searching for data.
Creating applications without programming using access macros.
Users of spreadsheets and databases must be familiar with many key concepts used in Access.
Before you start working with any software productIt is important to understand its capabilities and types of tasks, to solve which it is intended. MicrosoftAccess 97 (hereinafter - just an Access) is a multifaceted product, the use of which is limited only by the user's imagination.
Access - This is, first of all, database Management System (DBMS). Like other products of this category, it is intended for storing and searching for data, presenting information in a convenient form and automation of frequently repetitive operations (such as accounting, accounting, planning, etc.). With help Access You can develop simple and convenient forms of data entry, as well as process data and issuing complex reports.
Access is a powerful Windows application; For the first time, the performance of the DBMS is organically combined with those amenities that are available at MicrosoftWindows users. Since both of these products are Microsoft, they interact perfectly with each other. Access system works under windows control 95 or WindowsNT, so when working with it, the user is available all the advantages of Windows. You can cut, copy and insert data from any Windows application in Access and vice versa; You can create a draft form in Access and insert it into the forms constructor.
With OLE objects (ObjectLinkingandEmbedding - binding and implementing objects) in Windows 95 and MicrosoftOffice 97 components (Excel, Word, PowerPoint and Outlook), you can turn Access into a real database operating environment. With the help of new extensions for the Internet, you can create forms that will directly interact with the data from WORLDWIDEWEB, and broadcast them into the HTML language view, providing work with products such as InternetExplorer and NetscapeNavigator.
With all this, Access is not just a DBMS. how relational The Access DBMS provides access to all types of data and allows you to use multiple database tables at the same time. In this case, it is possible to significantly simplify the data structure, thereby facilitating the implementation of the tasks. ACCESS table can be associated with data stored on a large computer or on the server. On the other hand, you can use tables created in the Paradox or dBase environment. The results can be quickly and easily associated and combined with Excel's spreadsheets. Working in the MicrosoftOffice 97 environment, the user has at its disposal fully compatible with each other, Access and Word, Excel and PowerPoint.
Access system is a set of end-user tools for database management. It includes table designers, forms, requests and reports. This system can be considered as an application development environment. Using macros or modules for automating task solutions, you can create user-oriented applications as powerful as applications written directly in programming languages. At the same time, they will include buttons, menus and dialog boxes. Programming in the VBA language, you can create powerful programs such as the Access system itself. In essence, many Access tools (for example, masters and designers) are written on VBA.
Access power and availability make this system of the best DBMS from the market presented today. First, get acquainted with Access at the end user level. Then we turn to more complex items such as programming items on VBA and interaction with the Internet.
What suggests Access
1. Indeed relational model databases
ACCESS is fully implemented management of relational databases. The system supports primary and external keys and ensures data integrity at the kernel level (which prevents incompatible update or data deletion operations). In addition, the ACCESS tables are provided with tools to verify the allowability of data that prevents incorrect input, regardless of how it is carried out, and each field of the table has its own format and standard descriptions, which significantly facilitates data entry. Access supports all the necessary types of fields, including text, numeric, counter, money, date / time, memo, logical, hyperlink and OLE objects. If there are no values \u200b\u200bin the field of special processing in the fields, the system provides full support empty values.
Relational data processing in Access due to flexible system architecture is capable of satisfying any needs. At the same time, Access can be used as an autonomous DBMS in a file server mode or the client component of food such as SQLServer. Moreover. Access supports ODBC (OpenDatabaseConnectivity) protocol, which allows you to connect to set databases various formatssuch as SQLServer, Oracle, Sybase and even DB / 2 for large EUM. IBM.
The Access system supports transaction processing with a guarantee of their integrity. In addition, protection is provided at the user level, which allows you to control access to the data of individual users and entire groups.
Context-dependent certificate and Office. Assistant.
Microsoft's reference system is still the best in the industry, both for newcomers and experienced users. The Access provides a contextual-dependent certificate for which it is enough to press
In Access 97, Microsoft introduced Officeassistant (assistant) and screentips (pop-up tips). Pop-up tips contain short explanations of something. The system provides a whole gallery out of ten possible characters of assistants (you can choose anyone in your own taste). If a assistant You get tired, you can turn it off.
Simple to use masters and designers
Master (Wizard) can turn opening hours in minutes. The masters ask leading questions regarding the content, style and format of the object being created; Then they automatically build the desired object. As part of Access about a hundredmakers to help design databases, applications, tables, shapes, reports, diagrams, postal stickers, controls and properties. It is allowed to configure the masters to solve different tasks.
Importing, exporting and binding external files
Access allows you to import and export the files of many well-known formats, including dBase, FoxPro, Excel, SQLServer, Oracle, Btrieve, many ASCII text formats (including a fixed length of a string or a specified limiter), as well as data in HTML format. As a result of importing, the Access table is created; As a result of the export of the Access table, a file is created in a specified format.
Binding (Previously named join) Means that you can use external data without creating an Access table. You can set a similar connection with DBASE, FOXPRO, Excel, ASCII and SQL data. Very powerful opportunity - binding the Access tables with their external tables, followed by sharing; This refers to the Access, dBase, FoxPro and SQLServer tables.
Forms and reports WYSIWYG.
Window forms and report designers have the same interface and provide the user a lot of opportunities. The form or report is constructed on the WYSIWYG principle (whatyouseeiswhatyouget - what you see, you will receive). By adding the next control, the user sees how the created form changes.
In forms and reports, you can enable inscriptions, text data fields, switches, checkboxes, lines, and rectangles, and make them up, highlighting the elements with color and shadow. Moreover, it is possible to include entire drawings, charts, subform and accounts. In this case, all data representation parameters remain completely controlled by the user. Molds can occupy many pages, and in the reports there may be many levels of data grouping and summing up.
Forms and reports can be viewed in preview mode, By providing a view "From a bird's eye view" by changing the scale. In construct mode, the report can be viewed with fictitious data so as not to wait for the processing of a large real file.
Report Designer is a very powerful tool that allows you to use up to ten levels of grouping and sorting. Thanks to it, it is possible to create reports that demonstrate percentage and final indicators, which can be obtained only in two passages. It is allowed to create many types of reports that include postal stickers and mail mailing lists.
Multi-flash requests and relationships
One of the most powerful accessories of Access is both the most important. Relationships allow you to associate tables graphically. You can even associate tables representing files of different types (for example, ACCESS table and DBASE table). After such binding the table, there are already one of the whole, and now you can build requests in relation to any data in them. You can select specific fields, determine the sorting order, create calculated expressions and enter the selection criteria for the desired entries. You can display the results of the query in the form of a table, form or report. The user does not require a preliminary connection of links: instead, it is enough to enter the request designer (for example, when you want to build a specific report).
Inquiries apply in other cases. You can create requests that ensure the calculation of the results, displaying the grouped and building new tables. The request can be used even to update the data in the tables, delete records and add one table to another.
Charts and diagrams
Access is used the same graphical application as in MicrosoftWord, Excel, PowerPoint and Project. It allows you to create hundreds of graphs and chart types, configuring them based on specific needs. You can create histograms, bar, circular, surface and other diagrams, and both two and three-dimensional. They can be arbitrarily accompany the text, draw up different colors and patterns. Values \u200b\u200bcan be displayed in columns or sectors of circular diagrams. You can deploy images of diagrams so that they are reproduced at any convenient viewing angle. All this provides the ACCESSGRAP program.
Capabilities DDE and Ole.
Using DDE (DynamicDataExchange - dynamic data exchange) and OLE (ObjectLinkingandEmbedding - binding and implementing objects) In the form and reports of Access, you can add all kinds of new objects. Such objects may be sound, drawings, diagrams and even video clips. You can implement OLE objects (for example, raster images) or text processor documents (Word or WordPerfect) or install links with Excel spreadsheets. By tying these objects with their database, the user can create dynamic forms and reports, as well as use the same information in different windows applications.
Access to Internet
Access now provides all the features that provide communication with Internet / Intranet. With one click of the mouse button, you can save tables, requests, forms and reports in HTML format. The corresponding master allows even a newcomer to transfer hTML codes From the object on the Web page, making them available for use everyone traveling on the Internet! Hyperlinks allow you to access data that are posted on the Web page, directly from Access forms.
Many believe that the placement of data on Web pages should be carried out by WEB administrators. ACCESS 97 fully proves that this operation can be successfully implemented by any user. And it will help him in this placement wizard on the Web page, which ensures the conversion of selected database objects to the HTML format and transfer them already in this form to the Web page. With this wizard, you can create static or dynamic pages, transfer them to the Web server, create your own start page and even use templates to obtain a standard appearance of all HTML pages!
Built-in features
Access contains over one hundred functions (small embedded programs that are returned as a result of execution) performing a variety of tasks. There are functions for manipulating databases, rows, numbers in dates and time format, mathematical, business and financial. They can be used to create calculated expressions in forms, reports and queries.
Macros: Programming without programming
For non-programmers (or experienced users who simply do not want to program) in Access are macros. They allow you to automate the execution of some tasks. About fifty macros It is possible to manipulate data, create menus and dialog boxes, open forms and reports, word, automate the execution of almost any task. Using macros, you can solve about 90% of all data processing tasks.
Modules: Visual Basic. for Applications. programming databases
Access is a major application development environment with a full-featured programming language. VBA language (previously known as AccessBasic) implements an object-oriented approach to programming and allows the programmer to do almost everything that you can imagine. This is a powerful structure of structural programming. It is fully extensive and supports API procedures in any dynamic libraries (DLL) operating systems Windows 95 and WindowsNT.
A full-featured development environment supports many powerful modern features: multi-color mode for editing and debugging, automatic syntax check, control points, step-by-step execution and even a syntax help that displays the options for entered commands on the screen.
Even if you have already worked with any databases, it does not mean that with Access everything will immediately go smoothly. You can be a major specialist in relational DBMS such as dBase, FoxPro and Paradox, but not have experience working with databases in Windows.
First, it is necessary to get acquainted with Windows: work with the Paint editor, experiment with Word or Excel, learn how to use the mouse. It is worth creating a chart in Excel, use the services of one of the masters, contact reference system. All this will help in the future when developing Access. It is also necessary to get used to the new term.
Information for electronic tables
Advanced user Excel (or 1-2-3) will notice that Access and Excel are largely similar. First, both of these programs are Windows products, so it must already be familiar with Windows Agreement, which will be used and when working with Access. Appearance of tables and aCCESS requests corresponds to the appearance of spreadsheets and is called data tables ( datasheet. ). The size of the strings and columns of the tables can be changed in the same way as in the workers. excel sheets. In essence, the data entry mode in Access 97 corresponds to the input mode excel data. You just need to enter data and define column headers; All the rest Access will automatically.
Access, like Excel, supports WYSIWYG mode and work with a MicrosoftGraph graphic application. Thus, the user always has the ability to create single-type diagrams in both systems. In addition, Access includes a chart master, similar to those used in Excel.
As in Excel, the Access 97 provides a consolidated table master; In fact, with it, you can create Excel summary tables: information from Access databases can be easily transferred to Excel tables. Access databases can be associated with Excel tables. In both products, you can create queries and perform sorting using the same interface. (If the reader had to use the Excel menu to form requests and criteria for sorting data, it means that these concepts are already familiar to him.) Word, the Access 97 system is functionally compatible with all Office 97 products.
Lecture 1.
Basic principles of work
with the database in Microsoft Access.
1.3. Database creation.
1.4. Working with tables.
1.5. Data types.
1.6. Properties of fields.
1.7. Key fields.
1.8. Definition in the database of connections between tables.
1.9. Providing data integrity in Microsoft Access.
1.1. What is a "database".
In business or personal sphere, it is often necessary to work with data from different sources, each of which is associated with a certain type of activity. To coordinate all this data, certain knowledge and organizational skills are needed. Microsoft Access combines information from different sources in one relational database. Created forms, requests and reports allow you to quickly and efficiently update data, receive answers to questions, search for the necessary data, analyze data and print reports.
In the database, information from each source is saved in a separate table. When working with data from several tables, connections are established between tables.
To search and select data that satisfies certain conditions is created. Requests also allow you to update or delete multiple entries simultaneously, embedded or special calculations.
To view, enter or change data directly in the table apply forms. The form allows you to select data from one or more tables and display them on the screen using a standard or user-created layout.
For data analysis or printout, the report uses a certain way. For example, you can create and print a report grouping data and computing results.
To automatically perform some operations, macros are used containing a set of one or more macros, such as opening forms or printing reports. Macros can be useful for automating frequently performed tasks. For example, when you press the user, you can start the macro that prints the report.
Sometimes it is necessary to create your own procedure, which should be run from any database window or procedure designed to process a specific event. A set of procedures in the Visual Basic language, collected in one program unit, is called the module. There are two main types of modules: class modules and standard modules. Class modules are modules forms and report modules associated with a specific form or report. They often contain event processing procedures (for example, pressing the key) and are created automatically when creating the first event processing procedure. In standard
In the database window, you can work with all its objects. To view the objects of a specific type, select the appropriate tab (for example, "Tables").
Using the buttons to the right, you can create and modify existing objects.
1.2. Design database.
Before creating tables, forms and other objects, you must specify the database structure. A good database structure is the basis for creating adequate requirements, an effective database.
Database Design Stages:
1. Use the purpose of creating a database, the basic functions and the information it should contain. The database must meet the requirements of those who will work directly with it. To do this, it is necessary to determine the themes that the database must cover the reports that it should issue, analyze the forms that are currently used to record data, compare the generated database with a well-designed base, similar to it.
2. Develop the structure of the tables to contain a database on paper. When designing tables, it is recommended to be guided by the following basic principles:
The information in the table should not be duplicated. There should be no repetitions between the tables. When specific information is stored only in one table, it will be changed only in one place. It makes work more efficient, and also excludes the possibility of incomprehension of information in different tables. For example, in the same table should contain addresses and phone numbers.
Each table must contain information only on one topic. The information for each topic is processed much easier if they are contained in the tables independent from each other. For example, addresses and customer orders are stored in different tables, so that when deleting an order, the client information remains in the database.
3. Use the field you need in the table. Each table contains information on a separate topic, and each field in the table contains separate information on the table. For example, a table with data on the client may contain fields with the name of the company, address, city, country and telephone number. When developing fields for each table, you must remember:
Each field must be associated with the topic of the table.
The table must contain all the necessary information.
Information should be broken to the smallest logical units (for example, the "name" and "surname" fields, and not the general field "name").
4. Sweep the key field. In order for Microsoft Access to connect data from different tables, for example, the client data and its orders, each table must contain a field or a set of fields that will specify the individual value of each entry in the table. Such a field or set of fields is called the main key.
5. Payment links between tables. After distributing data on tables and definition key fields, you must select a circuit for communication in different tables. To do this, you need to define links between tables.
6. More reviews the database structure and identify possible shortcomings. It is advisable to do this at this stage until the tables are filled with data.
7. Add data and create other database objects. If table structures meet the requirements, you can enter all data. You can then create any requests, forms, reports, macros and modules.
8. Use the analysis tools in Microsoft Access. Microsoft Access There are two tools for improving the database structure. The table analysis wizard explores the table, if necessary, offers a new structure and communication, and also reworking it. Speed \u200b\u200banalyzer explores the entire database, provides recommendations for its improvement, and also implements them.
1.3. Database creation.
Microsoft Access is supported by two ways to create a database. It is possible to create an empty database, and then add tables, forms, reports and other objects to it.
This method is most flexible, but requires a separate definition of each database element. It is also possible to immediately create a database using the wizard.
a certain type with all the necessary tables, forms and reports. it the simplest way initial database creation. In both cases, you will have the opportunity to anyone
time to change and expand the created database.
If you create a new database (only in this case), the New Database File dialog box appears in which you must specify the name and location of the file for the created
database. Microsoft Access database file has an extension. MDB. In order to get a copy of the database, you need to copy the file in which it contains, since
When you exit Microsoft Access data changes are saved automatically. However, when the structure of any database object is changed in Microsoft Access, an invitation is displayed to confirm the preservation of these changes before completing the work.
1.4. Working with tables.
The table stores information on a specific issue, for example, the "Goods" table contains information about goods only, and the "Suppliers" table is only about companies supplying goods. In order for the data to be not duplicated and errors did not occur when issuing them, it is necessary to distribute these different kinds on different tables. The data in the table is organized into columns ("fields") and in the string ("records").
There are two modes of working with the table. You can select the designer mode or table mode by clicking on special button On the toolbar.
In the table constructor mode, you can create a whole table by adding new fields or deleting and configuring existing table fields.
To add a field, in the top of the table window, enter the field name and determine its type. To rename the field, change its name in the "Field Name" column.
The data type determines what type of data is allowed to be entered in the field. For example, inappropriate text entry in a cash type field. The choice of the appropriate data type provides data entry in the correct form for sorting, calculations and other operations. To determine or change the data type, select the "Data Type" column, click in the drop-down list field and select the data type from the list.
Each field has properties, changing which, you can control the preservation, processing and displaying field data. For example, for the "money" format automatically adds separator of groups of discharge groups and a currency symbol (1 234 gr.). To specify the field properties, select it at the top of the table constructor window and at the bottom of the window enter the value of this property or select it from the list. The set of available properties is determined by the field data type.
A unique label called the key is used to define each table entry. Just as the license plate definitely determines the car, the key determines the record. The key fields in the tables are used to create intershot bonds. To determine the key, highlight the string with the description of the desired field and click the key button on the toolbar.
The table data is added in the table mode, and tab data are edited. You can also check spelling and print table data, filter and sort records, change appearance Tables or change the structure of the table by adding or deleting the columns.
To add records, use the new entry button on the toolbar. When you press this button at the end of the table, an unfilled string appears.
To delete records, you must select any recording field and click the Delete Record button on the toolbar.
Rows in the table can be sorted according to the contents of one or more columns. To do this, select the field to be sorted, and click the Sort by ascending or sorting descending on the toolbar.
Filtering allows you to view only certain records in the form. Select the data by selecting, and click the Filter button allocated on the toolbar. In order to correct the filter, click the Edit Filter button. To set more detailed Condition To filter, select the Filter and subcommand in the recording menu. To apply a regular or extended filter, click the Apply Filter button on the toolbar.
1.5. Data types.
The data type determines what type of data is allowed to be entered in the field. For example, inappropriate text entry in a cash type field. The choice of the appropriate data type provides data entry in the correct form for sorting, calculations and other operations. Microsoft Access supports the following data types:
Text
Text or numbers that do not require settlements, such as phone numbers.
Memo field
Long text or combination of text and numbers.
Numerical
Numeric data used for calculations.
Date Time
Dates and times related to years from 100 to 9999 inclusive.
Monetary
Cash values \u200b\u200band numeric data used in mathematical calculations.
Counter
Unique consistently increasing (by 1) or random numbers, automatically introduced when adding each new entry in
Logical
Logical values, as well as fields that may contain one of the two possible values \u200b\u200b(True / False, yes / No).
Field of Ole object
Object (for example, Microsoft Excel spreadsheet, document Microsoft Word., drawing, sound recording or other binary format data), connected or embedded in Microsoft Access table.
Hyperlink
A string consisting of letters and numbers and representing the address of the hyperlink.
Master of substitutions
Creates a field in which the selection of values \u200b\u200bfrom the list is proposed, or from a list of a list containing a set of permanent values \u200b\u200bor values \u200b\u200bfrom another table. Selecting this parameter in the list in the cell starts the wizard wizard that defines the field type.
Lecture 2.
Entering and editing data
Data input
In the table mode, all entered data are displayed. If only the structure of the table is created, it means that there is no data table. In a blank table, the record marker (with the image of the triangular pointer to the right) is usually installed in the first row of the table.
To enter the value in the field (in Table mode), move the cursor to this field and type the value. During recording recording, the recording marker takes the appearance of a pencil. When entering a new entry (on the marker of which the pencil is depicted) the following line appears automatically (on the marker of which the asterisk is depicted to designate a new record). The new record marker always marks the last string of the table.
When entering a new entry, the cursor is usually placed in the first field of the table.
Depending on the operation being performed and the record type, the recording marker can take one of the four forms.
Current record marker.
Marker editable recording.
Blocked recording marker (when working in
multiplayer mode).
Marker of a new record.
Saving recording
Added or modified recording is automatically saved when you go to another entry or when closing the table, the recording marker changes its form: the pencil turns into directed right arrow.
To save the record, you need to enter a valid value in the primary key field The value of the primary key is checked by the type of data, uniqueness and other values \u200b\u200bof the value of the value entered in the Condition Condition property ( Validation. Rule )
Cancel button ( Undo Current Field / Record. ) Located to the tools, allows you to cancel changes made only to the current entry. After moving to the next record, this button will return to the normal cancel mode and, changing the next record, you can no longer cancel the change of the previous one.
You can save the current disc on the disk using the Record command-\u003e Save Record ( Records. -> Save. Records. ) or key combination< Shift. + ENTER >.
Check the correctness of the entered data
Automatic data type check
Some Access data types check automatically, without any intervention. For fields containing these types of data No need to fill in the properties of the condition for the value. List these types of data.
Numeric (Number)
Cash (Currency)
Date / Time (DATE / TIME)
Logic (YES / NO)
Numeric (Number) and Cash (Currency) allow you to introduce permissible numeric values. Although Access makes it possible to enter the letter in the Numeric field (Number), when you try to exit this field, a message dialog box appears "The entered value is not suitable for the field properties" Data Type "or Field Size" " An error message will also appear when entering other unacceptable characters or several decimal points, as well as when trying to enter an excessively large number for a specific size of the NUMBER type data field
Date / Time Type Fields (Date / Time) Check the correctness of the date and time values. If you try to introduce time 44:44:44 or just a letter in the Date / Time field (Date / Time), a dialog box appears with an error message
Logical (YES / NO) You can enter only one of the following specified values: Yes (yes), truth (true) ON (ON) or any different number from zero for logical Yes and no (NO), FALSE (FALSE), Off ( OFF) or 0 for logical no. In the Field Field Property (Format), you can define your own logic (YES / NO) type, but standard values \u200b\u200bare usually used.
Data entry methods
Entering data in the fields of various types is carried out different ways. For some data types, the valid value check is performed automatically. However, when creating some tables, you may need to enter data in non-standard (user-defined) formats and set the rules for checking the validity of the validity of the condition to value (ValidationRule). Next, we consider various ways to enter data. |
Standard text data entry
Three fields introduced into the "Moo Student" table were text (text) fields. In the FAMNAMENAME1 fields, the input mask is used to enter data. If you are entered with lower case letters, it will be displayed: the first letter is capital, the remaining is lowercase. Text can be checked for special values \u200b\u200band display in a given format.
Sometimes in the text type field ( TEXT. ) You need to enter a value consisting of several lines. For adding new String Press the key combination< Ctrl + ENTER >. This feature is useful for formatting the lines of the address field, as well as the Memo fields.
Type data entry type / time
The values \u200b\u200bin it are entered in the MMM GG format. Such a row when you enter 4/8/96 and exit from this field. Access will display a value as an ARG 96. In fact, the table is stored 4/8/92, and you can display it by placing the cursor this field. On the other hand, you can enter the Arg 96 in the field, and the ARG 96 will be saved in the table.
For the date / time field, you can also determine the condition for Between # 1/1 / 70 # andDate (). This condition suggests that the introduced date of birth should be included in the interval between January 1, 1970 and current date.
Formats affect data display, and not to the amount of memory occupied by them.
Enter text data with data verification
For a text field, a property can be specified. Condition to value. It limits the data entered values \u200b\u200b(for example, F, M, C). If you try to enter in this field the values \u200b\u200bother than F, M, and C, the dialog box appears with such, for example, by the message: In this field, you can enter only the value M, F or C. This message Determined by the "Error Message" Properties value for this field.
Entering numeric data with validation values \u200b\u200b|
For numeric fields, the rules for checking the permissibility of data are specified. For the result field, the condition of the condition is set to the value of the valuation value (\u003e \u003d 2 and<=5). При нарушении этого правила появится диалоговое окно с сообщением об ошибке. Это сообщение определяется содержимым свойства сообщения об ошибке для данного поля.
Ole data entry
The OLE field called Foto can be filling even without displaying the object (image) on the screen. The following objects can be stored in the OLE field.
Raster images.
Sound files.
Graphs and (diagrams).
Word or Excel.
The object is aware of the OLE-server, you can save in Access in the OLE field OLE objects are usually entered into forms so that they can be seen, hear or used. When placing an OLE object in the table, you will see the text of the object description (for example, in the OLE field you can see the inscription PaintBrushPicture). Enter the object in two ways.
Insert from buffer.
Insert from the Insert Insert Command -\u003e Object (INSERT-\u003e OBJECT)
MEMO type data entry
The Recenzia field contains MEMO data. This type allows you to enter up to 64000 bytes of text for each record. The table displays only part of the text entered. Press
Moving by posts in the table
As a rule, after entering data, it is often necessary to make some changes to this may be the following reasons.
Received new information
Errors were detected
Need to add new records
To change the data, first of all, open the table in the Database window, open the table in the table mode, double-clicking on the line with its name in the table list.
If you are in the Constructor mode (TableDesign), click on the Views Presentation button to go to the table mode to make changes to the data.
Moving on the records
To go to any record, you can simply put the cursor on it or click on it with the mouse, but if the tables are very high, the problem of rapid movement to the desired entry acquires special sharpness
To move on records you can use vertical stripe scroll. The arrow buttons on the scroll bar allow you to move the recording marker only for one position in one click so for a faster movement (through several entries immediately) it is better to use the scroll bar runner, you can also click on the area between the slider and the button on the scroll bar to move onto Many positions ahead.
The Edit Team\u003e Go (Edit-\u003e GO) provides several options for quick movement on the table.
Five buttons of transition located at the bottom of the window in the table mode can also be used to move on the records click on these buttons, you can go to any record If you know the recording number (row number for the specified record), click on the recording number field, enter Entry number and press
When moving on the table, pay attention to the scroll bars. Access will not update the recording number field until you click on any recording field.
Search for a specified value
Although, knowing the record number, you can go to it and find a specific field, in most cases it will be necessary to find in the record a certain value this can be done in three ways:
Select the Edit Team\u003e Find (EDRT-\u003e FIND)
Click on the Find button (FindSpecifiedText) located on the toolbar (binoculars are depicted on it).
Take advantage of key combination
When using any of these methods, a dialog box appears. To execute the search only on a specific field, place the cursor in it (and do it before opening the dialog box). Install in the checkbox checkbox only in the current field (SearchRechnlyCurrentfield), and Access will search only in the specified field.
In this dialog box, you can set various search options. In the text field, the sample (FindWhat) Enter the desired value of the value can be entered as in which it is presented in the field, or using the following special characters:
* - corresponds to any number of characters
Corresponds to one symbol
# - corresponds to one digit
To figure out how these characters work, suppose you need to find all the values \u200b\u200bthat begin with AB for this enter AV *
And now suppose you want to find the values \u200b\u200bthat end with the characters 001 in this case, enter *001 . To search for any value that begins with AB characters, ends with symbols 001 and contains only two characters between them, you need to enter Av ?? 001.. If you need to find all the surnames ending with "Co.", then to search for Broadsky and Tchaikovsky values, enter * ko.
In the matching list, the match (Match) contains three options:
With any part of the field (anypartoffield)
Fields whole (WHOLEFIELD)
From the beginning of the field (StartOffield)
Standard is the entire field option (WHOLEFIELD) for example, the PET value will be found if the value is equal to Pet. If an option is selected with any part of the field (AnyPartOffield), then the search will be retrieved by Petrov, Petrovsky. Sleeping, etc. As a result of searching with the installation from the beginning of the field (StartoFo, Petrov, Petrovsky will be found.
In the View drop-down list (Search), you can choose one or more options from the set all, up, down (Up, Down, All)
If you select the Options button only in the current field (SearchRechnlyCurrentfield), the value of the value will be carried out only in the same field checkbox (Matchcase) determines whether capital and lowercase letters will differ. By default, they do not differ when searching by Pet value will be found Petr, Peter and Petrov. When installing the checkbox, you must enter the search string, taking into account the capital and lowercase letters.
Obviously, for data type (Number), cash (CURRENCY) and date / time (Date / Time), the register of the register does not make sense.) When selecting the checkbox (MatchCase), Access ignores the checkbox based on field format (SearchFieldsAsFormatted) (If you formatted the fields of the table, select this check box) for example, you need to find in the recording field of all who born in April 1982 To do this, check the options checkbox based on the field format (SearchFieldSAsFormatted) and enter APR 92. If you do not install this check box, the search will have to perform by accurate date birth, for example, look for 4/8/92
Use the fields based on the format of fields (searchfieldsasformatted) can slow down the search.
The search will start after clicking on the Findfirst button or find further (FindNEXT) Finding the value, ACCsEns it to search for the first suitable value. Click the Find button. To search the following value you need to click on the Find button on the entire search process, the dialog box remains open. Therefore, finding the desired value, click on the Close button to close the dialog box
Change values \u200b\u200bin table mode
To change the value, go to it and make the necessary corrections. To edit the value there may be several reasons.
Adding a new value.
Replacing an existing meaning
Change existing value
If the field is empty, simply enter a new value in it when you enter in the field of any new values, stick to the same rules as when entering new records
Replacing an existing meaning
You can select the field using the keyboard or mouse when using the keyboard the contents of the field is highlighted (it is displayed in the inverse form) when you press any keys, the field content is deleted and replaced by the symbol corresponding to the key by clicking the key
Using the mouse, the contents of the field can be highlighted in the following ways:
Click on the left side of the field (where the pointer takes the view of the big sign "plus")
Double-click on the field (this method is not suitable if the text contains space)
Click and drag the mouse pointer through the contents of the field from left to right
Select any part of the field content and press the key
To replace the existing standard value from the default value property (defaultValue), select this value and click the key combination
To replace the existing value of the value of the same field of the previous record, press the key combination<Сtrl+"(кавычки)>
Make sure you have not pressed<С1г1+-(минус)>because in this case the current record will be deleted
Change existing value
To correct the existing value, instead of replacing it entirely, click before any symbol of this value. By placing the mouse pointer before a specific character, you activate the insertion mode, and when entering a new value, the existing values \u200b\u200bwill be moved to the right. After pressing the key
Ways to edit
| Moving inside the field | Keystrokes -\u003e and<- |
| Insert values \u200b\u200bin the field | Select the insert position and enter the value |
| Allocation of the contents of the field entirely | Press F2 or Double Click |
| Replacing the value of new | Highlight the entire field and enter a new |
| Replacement from the previous field | Ctrl + '(Apostrof) |
| Replacing the default value | Ctrl + Alt + Space |
| Insert breaking row (text, memo) | Ctrl + Enter. |
| Saving tech string | SHIFT + Enteri Transition to another row |
| Inserting current date | Ctrl +; (comma point) |
| Inserting the current Time | Ctrl + :( colon) |
| Adding a new entry | Ctrl ++ (plus) |
| Removing recording | Ctrl + - (minus) |
| Switch options options | Space |
| Cancel Change Tech Record | Esc or cancel button |
Fields that can not be edited
There are fields that cannot be edited by the types of such fields.
Cancel action
Sometimes the Cancel button (Undo), located on the toolbar, is not available, and it cannot be used. But only you will begin to edit the record, it will become accessible, and you can use it to cancel the entry of the elements of the current field. To cancel operations, the key also applies
Edit -\u003e Cancel (EDIT-\u003e UNDO) is also used to cancel operations, and the name of the command varies depending on the canceled action.
To cancel the value of the value in the Select Edit command, select Enter (Edit-\u003e Undotyping) or use the Cancel button located on the toolbar. After switching to another field, the changes made to the previous field can be canceled using the Edit command to restore the current field / record / record (Edit-\u003e UndocurrentField / Record) or the Cancel button (UNDO). Cancel all changes for the current entry that has not been saved, you can use the Edit command to restore the current field / record (Edit-\u003e Undocurrentfield / Record). After saving the entry, the changes made to it can be canceled by selecting the Edit\u003e UndosavedRecord command (Edit-\u003e UndosavedRecord). However, after editing the next record, these changes can no longer be canceled.
Copying and inserting values
Copying or deleting data into the buffer itself performs the MicrosoftWindows 95 / NT system itself, and not some special Access function. Copied or remote in buffer value can be inserted into another field or entry using the Edit-\u003e Paste (Edit-\u003e Paste) command or Paste Buttons from Buffer (Paste) located on the toolbar. Removal operations in buffer, copying and insertion from buffer are used to exchange data both between different Windows applications and inside the Access itself. Using this method, you can copy entire records to other tables or even to other databases, as well as exchange data with MicrosoftWord and Excel programs.
Replacing values
Edit Menu command -\u003e Replace (Edit-\u003e Replace) allows you to search and replace the sample. After selecting this command or keystrokes < Ctrl + H. > The dialog box appears on the screen,
This dialog box is very similar to the one that appears after selecting the Edit-\u003e command (Edit-\u003e Find). Only, in addition to the text field, the sample (FindWhat), it has another field to replace on (replaceewith). The search begins when you press the key
Adding new records
To add an entry in a table mode, place the cursor in the last string (where the recording marker has a star view) and enter a new entry to go to the new entry, you can select the command
Insert-\u003e Record -\u003e Record), click on the New Recording button (NewRecord) located on the toolbar, use the displacement buttons or the Edit command-\u003e Go-\u003e New Record
(Edit-\u003e Goto-\u003e New). You can also go to the last entry and press the key.< | > UWD need to add several new records, and the existing entries should be temporarily invisible menu command
Recording-\u003e Data entry (Records-\u003e DataEntry) will allow you to clear the screen from all records on time, and then you can edit new entries without interference. To restore all entries, select the command
Recording-\u003e Remove Filter (Records-\u003e RemoveFilter / Sort)
Removal of records
To delete an arbitrary number of entries, highlight them and press the key.
The standard installation for / this dialog box is the option of the Yes button (YES) so when you press the key
To highlight adjacent (T e. Adjacent) entries Click on the first record marker and drag the mouse pointer to the right to the right) to the last of those records you want to allocate
Adding, changing and removing columns
The ability to add, delete and rename columns in the table mode in Access 97 is a hazard in itself. The fact is that these operations change the data structure as you know, when making changes to the mode-constructor (TableDesign), the basic data structure changes, however, in the table mode, you may not even realize all the consequences of the changes made, therefore, creating databases for other users, Measures should be taken so that they cannot make changes in the table mode.
Deleting column in table mode
To remove a column in the table mode, highlight it and press the key.
Adding a column in table mode
To add a new column in table mode, select the insert ^ column (insert ^ column) command, and as a result of the column on the right of the cursor, the column will be created with the field header1 (field "1). Then you can enter this column in the recording of this column. New data.
When adding a new column, the table structure varies (i.e., a new field is added to it). When saving the ACCESS table, defines the properties of the added field based on the value entered into it.
Changing the field name (column title)
When adding a new column, it is desirable before saving the table to change its title. To do this, double-click on it and make the necessary changes. When saving the table, this header will be used as the field name in the table structure.
By changing the column header, you change the field name in the table. And if it is used in forms, reports, queries, macros or modules, then these objects will not work until you make corresponding corrections. This method of changing the name of the field is fraught with unpleasant consequences, therefore it is desirable that only experienced users use it.
Displaying records
When adding or changing records, you can enjoy both the mouse and the menu commands. Using the menu commands format (Format) or mouse, you can change the order of fields, hide and fix columns, change the height of the string and the width of the column, select another font and even display or delete the grid lines.
Changing the order of fields
By default, Access displays the fields in the table mode in the same order as in the table or request. However, sometimes you need to place some of the fields next to it easier to analyze the data contained in them. To change the order of the fields, select the column and drag it to a new place.
You can choose and drag the columns one by one or entire groups. Suppose you want Name fields to be at the beginning of the table. To do this, follow these steps.
1. Place the mouse pointer on the name of the field (column) name (it will take the form of directional down the arrow).
2. Press the mouse button and hold it in this position. As a result, the entire Name column will be highlighted. Release the button.
3.Name Click the name of one of the columns and hold it down; The pointer will take the appearance of the arrow with the frame.
Drag this column to the left border of the table. Release the mouse button, and the column will move to the top of the table.
Thus, you can move one or more selected fields to the left, right or even beyond the right! turn border windows.
Moving fields in the table mode does not cause changes in the table structure.
Changing the width of the field
To change the width of the field (i.e., the column), you need to specify it either in the dialog box (where it is determined by the number of characters), or dragging the right border of the column header (with the mouse pointer takes a form of a bifaceted arrow).
To change the column width, perform two simple steps:
1. Master the cursor between the two columns headers on the line of their separation.
2. Include the border of the column to the left to narrow it, or to the right to expand.
To instantly change the column width on the principle of optimal fit (taking the longest element as the basis), you need to double-click on the right border of the column header.
Changing the column width / does not lead to a change in the field size in the table: you simply change the dimensions of the column viewed for the Dananist that is contained.
There is another way to change the column width: you need to execute the format ^ column width (Format ^ columnwidth) or right-click on the column header and select the columnwidth command from the context menu. A column width dialog box (columnwidth) appears. Here you can ask
the width of the column measured by the number of characters. And to determine the default width, select the Standard Width box (StandardWidth) checkbox.
When dragging the right boundary of the column to the left to the border of the previous column, this column will be hidden. The same thing will occur when setting the value 0 in the column width dialog box (columnwidth). Therefore, to re-display a hidden column, run the format ^ Show columns (Format ^ unhidecolumns).
Changing recording height (string)
To change the recording height (i.e., place the mouse pointer to the recording boundary (in the recording marker area) and drag the top line border or select the format command ^ Rowheight Height (Format ^ Rowheight). The need to increase the height of the string occurs if you need to place text with a larger font or several rows of text.
When dragging the entry limit, the mouse pointer will change to change the row height, follow these steps.
1. Place the cursor on the division line between two lines in the recording marker area.
2. Drag the line border up to reduce, or down to increase the row height.
Changing the height of the string leads to a simultaneous change in the height of all rows in the table mode.
There is another way to change the height of the string: select the format ^ Row Height (Format ^ Rowheight). In this case, a dialog box appears in which you can enter the height of the string in points. To select the default height, select the Standard checkbox (StandardHeight).
If when dragging the border of the record up, it will cross with the border of the previous record, then all | Rows will be hidden. The same thing will occur when installing a string (rowheight), a value close to 0 (for example, 0.1) is installed in the dialog box. In this case, to display the strings, run the command) format ^ Line height (Format \u003d\u003e Rowheight) and set the standard string height.
Mesh display
Usually the screen is displayed on the screen, the lines of which serve as the boundaries of rows and columns. Using the format command "\u003d\u003e Cells (Format ^ Cells), you can determine whether this grid will be displayed and how it should look. (Mesh Dialog Box (Celleffects).)
Changing the display font
The size of the string and column varies automatically when the display font size changes. The default access displays all data in the MSSSANSSSERIF MSSSSSerif font mode and an ordinary design (REGULAR). You may find that it is incorrectly printed because it is a screen font. therefore better suitable ARIAL font 8 points and an ordinary design (Regular). Select the command format "\u003d\u003e Font (Fonnat ^ font) to change the type of font, its size and style.
Changing the display font affects the entire table. In order to see more information on the screen, select a small font size. If you have the necessary equipment, switch to a higher resolution. And if you want letters to be larger, increase the font size.
For the transition to the Arial font of 10 points and in the insertion of the bold (BOLD), follow these steps.
Select the format ^ font command, and dialog box appears on the screen.
In the Font field (font), select Arial,
In the FontStyle field, select a bold (BOLD).
Enter 10 in the size field (Size).
Click on the OK button.
When changing the font attributes in the sample area (sample), a sample of this font will appear. Thus, the penden than to make any changes, you can see them. If you wish, you can change the color of the font.
Hide and display columns
To hide the column, you can drag it the border to the previous field or set the value of 0 to the column width. To hide one or more columns, you can also use the format ^ Hide columns (Format ^ hidecolumns). To hide one column, follow these steps.
1. Place the cursor in any place the column you want to hide.
2. Select the format command ^ Hide columns (Format ^ HideColumns), and the column will actually disappear in the column width property (columnwidth) will be assigned to 0. To hide several columns, you must first select them, and then execute the format command ^ Hide columns (Format ^ Hidecolumns)
The hidden column can again be displayed using the Format Shake column command (Format ^ unhidecolumns) This displays a dialog box that allows you to selectively hide or show columns by installing or removing the marks from the corresponding options in the Column list (Column).
Fixing columns
If you want, during scrolling, individual table fields are constantly present on the screen, use the format command ^ Fasten the columns (Format ^ FreezeColumns) for example, you can make it so that the Name field is constantly visible while scrolling the table when you need to find other information. The fixed columns will be scented to the left of all columns if you need to fix several columns, then they must be adjacent (of course, the columns can be previously moved so that they are next to each other) and if you need to release these columns, select the format command ^ free all columns (Format ^ Unfreezeallcolumns).
Saving recording
Access saves an entry when you leave it to save the record without leaving it, click the key combination
Sorting and filtering records in table mode
When searching for some value, Access finds and displays the appropriate entry, but if a given criterion satisfies several entries, then for convenience, it is necessary to display only them using the sort and filtering buttons on the toolbar (or Filter (Filter) and sorting commands. Sort) From the recording menu (Records)), you can only display the necessary records on the screen, as well as quickly sort them in the desired order to sort the entire table, two sorting buttons are used, and to select certain records - three filtering buttons
Fast Sorting
Sometimes it is necessary to sort the entries in a specific sequence of the toolbar sort button allow to sort the columns ascending or descending first select the sorting fields, and then click on the Sort Ascending button (Sortascending (AZ)) or sorting descending -And) (SortDescending (ZA))
To select the sorting field, it is enough to place the cursor at the level of any recording After that, click on the corresponding button, and the data will instantly sorted
If you want to sort the data on multiple fields, select Several columns To do this, first highlight one column, and then press the key
To restore the initial order of registration, use the recording command ^ Delete Filter (Records ^ RemoveFilter / Sort)
Printing records
Table entries can be printed in rows and columns. Use the simplest way - select the file "\u003d\u003e Print (File ^ Print) or click the Print button (Print) located on the toolbar. In this case, a dialog box appears.
Suppose you installed the printer in the MicrosoftWindows 95 / NT system. Click on the OK button and type Wy the font you selected to display (or its closest equivalent for the printer). The printout will also reflect all the options set at the time of printing table. Hidden columns will not be printed. The grid lines are printed only if the mesh (CellSeffects) (Format ^ Cells) is noted in the CellSeffects dialog box (which is called the Format ^ Cells) options in the Gridlineshown group. For printout, you will need as many pages as needed to host all the data. Moreover, the division of data on the Access pages does automatically.
Printing table
You can control the printing process from the Print dialog box (PRINT), selecting the following options.
PrintRange prints the entire table or only selected pages or records
Copies (Copies) Defines the number of copies
Disassemble (collate) determines whether the printout will be disassembled over copies
Using the Properties button, you can call the Printer Settings dialog box. Button Setup IR) will allow you to define fields and headers.
Preview
Sometimes some doubts arise before printing the report. For example, is it not better to change the row height and the column width or choose another font? Therefore, before printing, you should always display the report on the screen to make sure that it is all right.
To do this, click on the button located on the toolbar, select File ^ Preview (File ^ printPreview). As a result, the preliminary viewing window will appear.
After clicking on the Preview button (printPreview), you will go to pre-prime prior mode before printing. The screen will feature the first of the printed pages, and new buttons will appear on the toolbar.
To move through pages, you can use the buttons located at the bottom of the preview window (as well as when moving on posts in the table mode).
The toolbar buttons provide quick access to the following print options:
Close Returns to Table Mode
Print opens dialog box
One page shows one page in mode
Preview (printPreview)
Two pages Shows two pages in mode
Preview (printPreview)
Scale selection increases or reduces display scale
document
To view more than two pages, execute the command View ^ Page Number ( VIEW. ^ Pages ), and then select 1, 2, 4, 8 or 12.
If you are satisfied with the view of the table in preview mode and want to print it, click the Print button (Print) located on the toolbar. If something confuses you, click on the Close button, and you will return to the table mode where you can edit the data or change the layout.
Conclusion
Considered data entry receivers in table mode, moving via strings and columns and data changes, movement of rows and columns and change their size, preview and print tables.
In the table mode, the data is displayed as strings (entries) and columns (fields).
Using the scroll bar, the cursor control keys, the menu options and the transition buttons you can quickly move around the table and place the cursor in any entry or any field.
You can go to table mode (datasheet) from any mode of the constructor mode (TableDesign) by clicking the Table Mode button (DataSheet) (you can also click on the Open button in the database window).
When entering data into the table, the corresponding string is marked with a new record marker.
i. Access performs automatic data validation of different types (These are the types of number-I Howl (Number), Currency, Date / Time (DATE / TIME) and logical (YES / NO)). Moreover, at the table level or form, you can add your own rules for checking the permissibility of data.
OLE objects (for example, sound, drawings, graphics, documents Word. And digital videos) can be inserted in the OLE field using the insert command \u003d\u003e 0Bext (INSERT ^ OBJECT)
Using the move buttons (located at the bottom of the table), you can quickly navigate.
The specified values \u200b\u200bcan be found and replaced using the Edit command ^ Find (Edit ^ Find) or edit ^ Replace (Edit ^ Replace).
To insert in the default field, you need to click<Сп«1+А11>+ Space key, and to insert the field value from the previous entry -
In the fields of some types, these edit cannot be edited. This is a field of type counter (Autonumber), a calculated, blocked, inaccessible, field with blocked entries, as well as fields from some types of queries.
Using the cancellation function (UNDO), you can cancel entering the value of the field, the current entry or the saved record. To delete the record, you need to select it and press the key. Or select the Edit command \u003d\u003e Delete (Edit ^ Delete)
The appearance of the table can be changed, in a new one-time ordering fields, changing the displayed column width or row height and choosing other fonts.
Columns can be hidden and displayed, secured and released; You can also delete and display on the screen of the grid line.
Using the sort buttons, you can instantly change the layout of the entries when displaying.
The FilterBySelection Filter Buttons and change the filter (FilterByForm) are used to determine the order of sorting or filtering criteria for entries in the table.
Command file ^ Printing (File ^ PNNT) Used to print a table, and the File command ^ Preview (File ^ PrintPreView) -For preview pages before printing.
Masters Microsoft Access 97
Database Creation Wizard
Wizard analyzing tables
Master of requests
Database Creation Wizard
The database creation wizard helps to quickly start working at Microsoft Access as a newcomer and a professional. You can choose from a library consisting of more than 20 different types of databases, the one that is most suitable for a particular purpose.
Data Import / Export Master
If the user already has data stored in some format other than Microsoft Access format, it can use the Special Import / Export Operations Master. This wizard allows you to flexibly manage data when importing and exporting text or data from spreadsheets, as well as when exporting Microsoft Access data to text files. The wizard allows you to select the correct field separators, data types, etc. ... The wizard has a feature of previewing the converted data to simplify the control of the conversion process.
Wizard analyzing tables
This wizard allows you to quickly create a relative database with multiple tables and relationships between them from a large "flat" data table. The wizard will analyze the existing table and suggest the optimal way to transform it into the database.
Master of requests
If necessary, make a sample from the available data, you can use the query creation wizard. This wizard automatically creates requests for sampling data from one or more tables. The ability to operate in several tables by tying separate fields of tables arbitrarily, allows you to create flexible branched data structures that are convenient in management and efficient to use. In addition, the wizard allows you to group data and calculate the total values, for example, you can count orders grouped by the placement dates.
Sharing data
The Special Database Separation Wizard allows you to divide the database into two files, the first of which contains the actual table with the data, and in the second - requests, forms, macros and modules. This solves the problem of organizing the processing process of one data array by several users. At the same time, users working on the network can use a common data source, change form, reports and other objects used to process data at a particular workplace.
Solutions for Internet and Intranet
Microsoft Access 97 includes properties that allow you to publish data from Microsoft Access on the Web server. For example, HTML is included in the formats list in which reports can be created, and now it is very easy to publish data as a Microsoft Access report on the server.
Microsoft Access has a special quick-moving wizard information from the database to the Web server.
Microsoft Introductory Course Plan Access 97 (MSA)
For teachers Kneu
Prerequisites: Acquaintance with Windows and Windows Applications (Word, Excel, etc.)
1. Introduction.
1.1. Main propertiesMSA.
1.1.1 Relational model (relationship in comparison of the hierarchy)
1.1.2. Multiplayer environment.
1.1.3. User interface.
1.2. Typical applications (examples) and short comments.
1.2.1. Leather book
1.2.2. Database. "Library"
1.2.3. Accounting for accounts / orders.
1.2.4. Demonstration database "Borea".
1.3. MSA database architecture.
1.3.1. Tables - data warehouse.
1.3.3. Blanches - a graphical interface to the data.
1.3.4. Reports - sealdandas
1.3.5. Macros and modules - automation.
2. Creating a database.
2.1. Design database.
2.2. The attacks of the database creation.
2.3. New database.
2.4. Import data.
2.5. Preservation of changes
3. Designing tables.
3.1. Fields and entries.
3.2. Types of fields
3.3. Default fields
3.4. Checking the correctness when entering.
3.5. Masking with input
3.6. Table binding.
3.7. Primary keys.
4. Working with tables.
4.1 Formatting rows and columns.
4.2. Fixation, hide, and ordering columns.
4.3. Fast sorting and filtration.
4.4. Setting the version of the language during sorting.
5. Build queries.
5.1. Using QBE for query development.
5.2. Sorting.
5.3 Properties of fields
5.4. Choosing criteria.
5.5. Calculated fields.
5.6 Builder of expressions.
5.7. Grouping and (intermediate) results.
5.8 field properties.
5.9. Multi-bonds (use of links).
6. Import data.
7 Basics of forms.
7.1 Window. Project, Tools and Palette.
7.2. Basic means creating and editing forms.
7.3. Control and control window.
7.4 Form properties.
7.5. Binding forms and data sources.
7.6. Management and its binding to the data source.
7.6.1. Text box.
7.6.2. List Boxing and Combined Boxing
7.6.3. Boxing check.
7.7 Output of the properties of the form.
7.8. Using a form creation wizard.
8. The main form / subform (composite form).
9 Basics of macros.
9.1. How to develop them: do not write recording.
9.2. Overview Macrocomand.
9.3. Macro automent.
10 Control buttons in forms.
10.1 Macro appointment.
10.2. Using a wizard when creating buttons.
11. Reports.
11.1. Source and differences with forms.
11.2.Groups, group intermediate results and group top / footer.
12. Creating a simple application.