Describe Excel table formatting processes. Appointment and removal of formats in Excel
Before sending to print or on the MS Excel page projector screen, formatting should be formatted for giving it a beautiful and presentable type. This is done to increase the informativeness of the data, that is, to facilitate the perception of information by all users.
Formatting tables in Excel is:
1. Installing the format of numbers.
2. Setting type, type, size and colors of fonts used.
3. Install the required size of rows and columns.
4. Combination (if necessary) groups of cells.
5. Adding the corresponding external borders and colors of fill for cell bands.
6. Perform the leveling of records relative to the boundaries of the cells.
7. Protection of records from random changes.
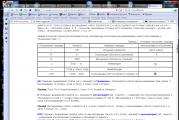
Many of these actions (but not all) are performed using the MS Excel toolbar buttons "Formatting" and familiar to everyone, even novice users. I, for example, the "Formatting" panel looks like the screenshot below.
If you click on the arrow located on a gray background, on the right end of the panel, you can add new or disable existing buttons, that is, set up the panel as it is convenient for you.
You can (and often needed) to do the panel setting, see and select options, but today it's a little about a friend. I will tell about one embodiment, which often uses myself. It is not some kind of special, just one of the thousand possible options for formatting tables in Excel. MS Excel novice users can simply repeat it and, realizing the logic and sequence of actions, choose their way to solve this problem.
An example of formatting a table.
By creating a table in Excel, filling it with data and formulas, do not be distracted by appearance !!! Make a table, check the correctness of the formulas and only then do it formatting it! With this approach, you will spend much less time, we make fewer errors and avoid many repeat manipulations.
Suppose you created a table to calculate the mass of rectangular billets from the steel sheet.

1. Format the Table Title.
1.1. Select the A1 ... E1 area, click on the "Combine and Place the Center" button on the "Formatting" panel. The cells were united in one, the header text is located in the center.
1.2. We choose the font - "arial", the size of "16", "bold", "emphasized", the color of the font is "purple".
2. Format column headers.
2.1. Select the cells A2 and B2, click on the "Combine Cell" button.
2.2. Select the cells A7 and B7, click on the "Combine Cell" button.
2.3. Select the cells A2 and B2, press and hold on the keyboard the "Ctrl" button and select the cells A7 and B7 - as a result we have two dedicated combined cells.
2.4. We choose the font - "Arial Black", size - "12", alignment - "on the left edge", the color of the font is "lilac."
2.5. We highlight the range C2 ... E2, press and hold the "Ctrl" button on the keyboard, select the area C7 ... E7.
2.6. Choose the font - "Arial Black", size - "8", alignment - "centered", the color of the font is "purple".
2.7. To reduce the horizontal size of the table, we will place the inscriptions in C2, C7, E2 cells in two lines. To do this, in the C2 cell in the word "designations" after the letter "A" set the sign of the transfer "-" and click on the keyboard the combination of the "ALT" and "ENTER" keys. The second part of the word is "trial" - remained in the same cell, but it is located on the line below. Similarly, we do records in C7, E2, E7 cells.
3. Format the record.
3.1. Select the records of the source data and the result of calculations - the range of A3 ... E6 and the range of A8 ... E8.
3.2. Choose the font - "arial", "11", "bold", "centered", "blue".
3.3. We highlight the B3 ... B6 range and the B8 cell and align "on the left edge".
3.4. We highlight the range of A8 ... E8, change the color of the font to the "red".
3.5. We highlight the D3 ... D6 range and click right mouse button. In the resulting context menu, select "Format cells ...". In the "cell format" window that opens, configure the numeric format of the source data.

3.6. We highlight the D8 cell and just as in the previous paragraph via the "cell format" window set up a numeric format of the calculation result by setting three signs after the comma.
The "Cell format" window contains six tabs that allow many actions to change the appearance of the contents of the cells. A number of commands are available only from this window and you do not perform them using the "Formatting" panel buttons.
4. Set the size of rows and columns.
We establish the mouse cursor on the header of the column "A" near the border of the column "B". As soon as the mouse cursor takes the view of the cross consisting of a vertical line and a horizontal multidirectional arrow, we make a double-click left-click. The width of the column "A" became the size of equal to maximum recording in the column - 15 pixel.
Slopping on all columns and rows of the table, we obtain acceptable dimensions. If necessary, you can set the column width or the string height manually. To do this, after accepting the cursor of the mouse of the cross, you need to press the left mouse button and, while holding it down, move the border in the desired direction. In the example, I increased the width of the column "A" manually to size 21 pixels.
5. We draw the borders.
5.1. Select the A2 ... E8 area and click on the "All Border" panel button and next, without removing the selection, click on the "Thick External Border" button.
5.2. We highlight the cells A2 ... E2 and click on the "Formatting" panel button "Thick external border". Similarly, we framed the range A7 ... E7.
6. We perform the fill with color ranges.
6.1. We highlight the D3 ... D6 region, choose the color of the fill - "light turquoise". In such cells are stored in source data.
6.2. We highlight the D8 cell, choose the color of the fill - "light yellow". This cell displays the result of calculations.
7. We carry out the protection of formulas from random changes.
7.1. We highlight the D8 cell right-click, select the "Protection" tab in the "Cell Format" dropped in the "Code" format window and set the check mark opposite the "Protected Cell" inscription.

7.2. Go to the MS Excel Main Menu and perform: "Service" - "Protection" - "Protect Leaf". Password can not be set. Cell from random changes is protected. Protection against intruders is another topic.
In this example, we examined in detail how to format the tables in Excel. The result is in the picture below.

The appearance of the table has changed significantly. Compare with the initial option. It is possible that the table is overlooked by the paints, the combination of which is a beamless. But the fact that the information is now easier is perceived - this is, I think it is undoubtedly.
You can keep statistics, and to the table all transactions that will be produced. You already know how, but, in addition, if you wish, you can make this table more convenient for your work if you enter the menu item Home - format as a table And choose one of the options that are there. Just before choosing, you will definitely select at least one cell in the table, otherwise the Excel program will not know what table to format.
In the table headers, after selecting formatting, pressing by clicking on which you can sort data, or filter, leaving only the data you need.
You can also not use ready-made options, but create your own style excel 2007 table formattingif you go to Table Formatting - Create Table Style . For each element excel tables You can choose your format.
 With this table formatting in Excel 2007, a new menu item will appear Constructor
. This item appears if a cell is highlighted in an Excel formatted table. If the cell is highlighted outside the table, you will not see this item. It has additional formatting options: you can install or remove checkboxes from items. Alternating strings
and Alternating columns
To change the color of the borders. In point Express styles
You can also choose a completely different formatting option.
With this table formatting in Excel 2007, a new menu item will appear Constructor
. This item appears if a cell is highlighted in an Excel formatted table. If the cell is highlighted outside the table, you will not see this item. It has additional formatting options: you can install or remove checkboxes from items. Alternating strings
and Alternating columns
To change the color of the borders. In point Express styles
You can also choose a completely different formatting option.
 You can also in the menu Constructor
Remove duplicate strings, make a pivot table, or convert the table in the range.
You can also in the menu Constructor
Remove duplicate strings, make a pivot table, or convert the table in the range.
Team Convert to range Returns the Excel table to the usual mind, but the formatting of the cells (background color, text and the color of the borders) remains as it was. To remove the formatting of the cells, apply the command. Sample format . Highlight outside the Excel table unformatted cell, and in the menu the main Find the icon with the image of the tassel. She is on the left under the icons Cut and Copy . Click on it. The cursor will change to the cross with the image of the tassel. Highlight now the entire table. You will see that the table format will change - will become like the cell format adopted for the sample.
![]() Also for formatting tables in Excel 2007 You can apply a command Home - Styles of Cells
: both for the entire table immediately and for individual cells. Highlight the cells to format, go to this menu item and click on the style you need. When you hover on the styles, you can immediately see the result, how will it be if the style is applied.
Also for formatting tables in Excel 2007 You can apply a command Home - Styles of Cells
: both for the entire table immediately and for individual cells. Highlight the cells to format, go to this menu item and click on the style you need. When you hover on the styles, you can immediately see the result, how will it be if the style is applied.
 In addition, there is another feature to change the table formatting in Excel 2007. Go to the item Page layout
. In the left part you will see a subtitle Topics . It can change in it Colors, Fonts, Effects
For the entire leaf Excel immediately. The best changes in fonts are visible, although the colors will also change if you, for example, apply to this command. Format as a table
.
In addition, there is another feature to change the table formatting in Excel 2007. Go to the item Page layout
. In the left part you will see a subtitle Topics . It can change in it Colors, Fonts, Effects
For the entire leaf Excel immediately. The best changes in fonts are visible, although the colors will also change if you, for example, apply to this command. Format as a table
.
You can get more detailed information in the "All Courses" and "utility" sections in which you can go through the top menu of the site. In these sections, the article grouped on topics in blocks containing the most deployed (as far as possible) information on various topics.
You can also subscribe to a blog, and learn about all new articles.
It does not take much time. Just click the link below:
Tool work with tables appeared inExcel for a long time (in previous versions of the program it was called lists). However, it is in Excel 2007, 2010 that work with tables have found features of a truly complete tool. In addition, very useful for working with accounting databases. Features of working with tables in Excel 2010 I will show on the example of the base shown in Fig. 1. This is a fragment of the registry of tax invoices. In it, I left only 10 records. And the base itself consists of such fields:
- "Foundation "- document number (invoice). Externally, the number looks like a number, but it is presented in text format;
- " Date »- Document registration date. It is formatted in the form of a date;
- "Nimpredpr "- Name of an enterprise (counterparty). This is a text column;
- "Inn »- Individual tax number. The column is also formatted as text;
- "Communication "- Total amount over invoice, including VAT. These values \u200b\u200bare determined by the formula. For example, for cell "E2. "The formula will be such"\u003d F2 + G2 "(Amount for the goods plus VAT);
- "Sumbesnds " - price without VAT. This value is presented as a number;
- "VAT "- VAT sum. For cell "G2. "The formula looks like this:"\u003d F2 / 5.
I think everything is clear with the base. Now our task is to convert it to an Excel table and see what advantages gives such a conversion during data processing.
To create a table from an arbitrary database in Excel 2010, do so.
1. Call Excel 2010, we open a document as in Fig. one.

Creating tables in Excel 2010
2. Put the active cell index within an area of \u200b\u200bthe database. For our example, it can be any cell within the block "
A2: G10. " If desired, the range of cells can be specified manually by highlighting it on the worksheet. It can be a block of any size, but it is better to specify only the address of the speakers. The fact is that over time the number of entries in the database can grow. Therefore, it makes no sense to limit its size to a specific line number on the work sheet. Based on this, in our example, the range of cells for conversion to the table could look like "A: G.3. Go to the menu "The main ".
4. On the tape of this menu in the section "Styles »Click on the icon"Format as a table"(Fig. 2). A window opens with formatting options shown in Fig. 3.


5. Double mouse click any option. I chose "Table Style: Light 1" The window shown in fig. 4. In Nem. Excel 2010 will show the range of cells, which it intends to convert to the database.

6. Turn on the checkboxTable with headlines" Database in Fig. 1 contains headlines, and we must report this program Excel.
7. Check the range of cells that Excel offers to include in the table. If the Excel range is determined correctly, click "OK " If the range is selected incorrectly, adjust it (this can be done directly on the work sheet). And only after that click "OK " The table will take a look as in Fig. five.

To cancel Formatting the cell block in the form of a table is done so.
1. We put a pointer to the active cell inside the table.
2. Click on the button "Constructor »Main menu of the program.
3. In the "Service »Click on the button"Convert to range».
However, back to the table in Fig. 5 And let's see what we got in fact. As a result of our actions Excel 2010 analyzed the contents of the working sheet around the active cell. In the block "A1: G11 "He discovered the database, allocated it and applied to the cells of formatting parameters from style"Table Style: Light 1" As a result, the headlines of the table acquired a bold, and the rows with even numbers are formatted on a gray background (such design makes the table more readable).
Council To fully take advantage of the tables, save the files in the format Excel 2007, 2010 (with expansion "* .xlsx ").
But that's not all. In addition to formatting, Excel 2010 has provided a table near the unique properties that make it much more convenient to work than with regular working sheet cells. Let's look at these features.
Data filtering in Excel tables
Look at the first line of the cells of the cells converted to the table. It appeared selection icons characteristic of the tool "Auto Filter. Excel has included it at the cell block conversion phase to the table. A click on any of these icons discloses a special menu through which you can make a sample of entries from the database for a given condition. For example, choose from the database information on the counterparty "LLC "XPERIA". We do so.
1. Click on the icon of the drop-down list in the column "Nimpredpr " The window opens, as in Fig. 6.

2. In it, we leave a tick only near the element "LLC "XPERIA" " The remaining ticks are removed.
3. Press "OK " Only records on the counterparty will remain on the screen.LLC "XPERIA".
Of course, when working with autofilter, other conditions can be used: "contains "," does not contain "," more "," less ", etc.
Automatic filter application is important, but not the only advantage of tables Excel 2010. There are other opportunities that will help the accountant to work with large amounts of data.
Immediately after creating a table Excel assigns her a unique name. By default, the names will be: "Table1 "," Table2 "And so on. To find out the name of the current table, do so.
1. We put a pointer to the active cell inside the area with the data. The menu will be available.Designer "(Fig. 7).

2. Click on this menu with the left mouse button. The tape will open to work with the tables.
3. In the "Properties »Find the parameter"Table name: " In our particular case, the tax invoice database Excel assigned the name "Table1 "(Fig. 7).
The name of the table can be corrected. To do this, you need to enter the constructor mode and in the field "Table name: "(group" Properties ») Enter the new name and click"ENTER. "
The table name can be specified in formulas dropning out lists, built-in features or when determining the data source for a summary report.
Council Use tables Excel as a data source for summary reports. Since the tables themselves change the dimensions as they fill out, the newly created records will fall into a summary report automatically. Override the data source in this case does not have to - will simply be easy to update the consolidated table.
It is very convenient to use the name of the table in combination with the search features "PRD () "," GRP () " In my opinion, it is this case that is the greatest interest for an accountant. Based on this, I will give a small example.
We want to select the name of the enterprise from the database number and write it to the cell "J1. We do so.
1. In the cell "I1 "We enter the invoice number. For example, the value "003 ".
2. In the cell "J1 "We introduce the formula"\u003d VD (I1; Table1; 3) " In this expression "I1 »- Cell with a desired value. Parameter "Table 1 "Means a link to the database. Number "3 »Speakers in the database from which"PRD () "Return the result. For invoice with the number "003 "This result will be"LLC "XPERIA".
Council Use instead of links to cells table names. This will reduce the risk of error in addressing cells. In addition, when changing the database sizes, you do not have to adjust links to the table inside the function "PRD () ".
Creating Formulas in Excel Tables
When adding data to the finished table, its size Excel will change automatically. So, if at the end of the table introduce a new string, it stretches down. If the side of the table is adding columns, it will increase in width. In the lower right corner of the table there is a special marker (Fig. 5). It shows the location of the extreme right cell of the current table. The position of the marker can be changed by pulling it with the mouse to the new place of the working sheet. The range of the table will also change. Practically it looks like this.
1. Open the document shown in Fig. five.
2. We put a pointer to the active cell on "B12. "(The first free cell in the column"Date ").
3. Enter the value. For example, "01/17/2012.
4. Press "ENTER". In the cells "E10" and "G10 "Formulas will appear as if they were copied from the superior line.
We repeat the same action, but now we will leave the active cell and the last record in the database of an empty string between the actuator. In other words, we put a pointer to the cell "B13. "And enter the date value. The range of the table will not change, and the formulas in the cells will not appear.
Important! When the table is replenished with new records, do not leave empty gaps between the database and the row fill.
Filling the cells by formulas is not only when adding new entries to an existing table. Such an operation Excel will also make when changing the range where the current table is located. We do so.
1. Open the database, as in Fig. 5. Go to the end of the table.
2. We set the mouse pointer to the marker in the lower right corner of the last cell of the database (Fig. 5).
3. When the cursor takes the form of a bidirectional arrow, hold the left mouse button and drag the marker down to several lines.
4. We release the mouse button. Excel will add new entries to the database. And in these records, it immediately copies the calculated formulas. In our example, such formulas will appear in the columns "E "and" G ".
When adding new Excel columns will automatically connect them to an existing table. If the new column contains formulas, it is not necessary to copy them at all. It is enough to enter the formula once, and Excel itself copies it to the entire height of the table. In practice, it looks like this.
2. In the cell "H1 »We enter the title of the new column. In our example it will be "Control ".
3. Go to the cell "H2. "And we introduce the formula"\u003d G2-rounded (F2 / 5; 2) " This formula checks the correctness of rounding values \u200b\u200bfrom the column "G. "
4. Click "Enter " All cells tables on column "H. »Will be filled with formulas.
Headers in Excel Tables
When working with large tables, it is customary to fix the header string so that it always remains on the screen. IN Excel 2010 It is for this designed icon "To fix areas", Which is located on the ribbon menu"View »In the group" Window " After converting the block of values \u200b\u200bto the table Excel The need for this icon disappears. When turning down the table down Excel instead of alphabetic signs of columns ("A "," b "," C "And so on) will substitute the names of the fields from the headlocks string. To look at the work of this tool do so.
1. Open the document with the table, as in Fig. five.
2. Add multiple entries to the database so that it does not fit on one screen in height.
3. Purp the database "Down" so that the headers go beyond the top of the working window. The string with Excel 2010 column designations will take a look as in Fig. 8. Thus, when working with tables, the need for forced fixing rows and columns disappears.

Results in Excel Tables
The final values \u200b\u200baccording to the Excel table can be obtained literally in one mouse movement. For example, for the base in Fig. 5 It looks like this.
1. Open the document, set the active cell pointer inside the table.
2. Go to the menu "Designer. "
3. In the group " Table Style Parameters»Turn on the checkboxShow a final line" At the end of the table, a line with a total result (Fig. 9) appears.

4. Click the left button at the value of the total or on the word "Outcome " A drop-down list icon will appear next to the cell.
5. Click the mouse to reveal this list. A menu from 10 points will appear. They lists possible functions to determine the result ("Average "," Number "," Maximum "," Minimum " etc.). Option "Other functions ...»Opens access to all embedded features from the library. Excel 2010.
6. In the list, select the appropriate function and click on it with the left mouse button on it. Excel 2010 immediately recalculates the result.
Addressing receptions in tables Excel
When accessing data within the table instead of the range of values, it is convenient to use field names. For example, to sum up all numbers in the column "VAT "In the table in fig. 5, you can use the formula "\u003d Sums (Table1 [VAT])" This formula does the same as "\u003d Sums (F2: F10) " But working with names has significant advantages. In particular, in the formulas with names it is not necessary to specify the physical addresses of the cells. Adding data at the end of the table, the summation range will be automatically changed.
In addition, when working with tables, you can apply special addressing methods. In Excel 2010 there are five such ways, namely:
- "\u003d Table1 [# All] "- link to the entire table, including column headers, data and string of outcomes;
— « Table1 [# Data]"- link to the data excluding the headlock string;
— « \u003d Table1 [# headers]"- reference to the first line of the table together with column headers;
- "\u003d Table1 [# RESULTS] "- reference to the string of the results (if it is included in the active table);
— « Table1 [# This line]»- Link to the current line. For example, the formula "Table1 »Will refer to VAT value from the current table row.
Here are some examples of formulas using a special addressing in relation to the table in Fig. 5. Formula "\u003d Sums (Table1 [# Data])"Count the sum of all numbers in the database. In our case, it is equal to "42641.85". The same result can be obtained by the formula "\u003d Sums (Table1 [# all]) " To determine the amount of VAT for invoice with the number "001 "(Second table line), you can use the formula"\u003d Table1 [@ VAT] " It must be entered into any free cell of the second line of the working sheet (for example, in "I2 ").
Perhaps, this is all you need to know about working with tables in Excel 2010. In my opinion, the tool turned out to be comfortable, easy to use. And, most importantly, it is perfectly adapted to work with the tables of large volume. And this means that in the work of the "Smart" table, the tables will certainly find their application.
Successful work! Waiting for your letters, proposals and comments on[Email Protected] , [Email Protected] .
NOTE . After the conversion of the table in the range of the table function will be inaccessible. For example, column headers will no longer contain arrow for sorting and filtering, and structured links included in the formulas (links in which table names are used) will be converted to conventional cell references.
Delete table along with data
Highlight the table on the sheet. To highlight the table entirely with the headers, double-click the Ctrl + A key combination.
Press the Delete key.
You need to create an extended filter
Set the Criteria for finding information and data extraction area, if necessary (see Fig. 66).
Select the data on the tab, in the Sort and Filter group, command executive. In the Advanced Filter window, filter creation mode: Filter the list on site or copy the result to another location and specify: Source Range, Conditions Range Hipomstore Results in the range. Press approx.
Figure 66. Advanced filter
The obtained data can be sorted and printing.
Search and replace data
Search and replacement can save weight
Suppose that the rate of Art is changed. Engineer from 24500 per 54500, and there are several hundreds of hundreds in the enterprise. Search and replace data will take quite a lot of time. To automate this operation in Excel There are search and data replacement functions.
Figure 67. Data Replacement Dialog 
Task38
Creating final tables
Sorting and summing up
Microsoft Excel. Can automatically calculate general and intermediate results in the list. When inserting automatic intermediate results Microsoft Excel. Changes the markup of the list, which allows you to display and hide the lines of each intermediate result (Fig.68).

Figure 158. Sports Inventory Sales List
To create the final tables, it is necessary:

Figure 169. Dialog box Intermediate results
In the intermediate results appeared in the window (Fig. 69) in half, each change in select a column for counting the results. In the example above, you need to select the "Sport" column.
In the Operation field, select a function to calculate the outcome. Examples of functions can serve as functionsSums, account and secondary .
In play the results of by selecting columns containing the values \u200b\u200bfor which you need to sum up. In the example above, you need to select the "Sales" column.
In order for each result, the page breaks, set the end of the page between the groups.
So that the data are displayed above the data strings, and not under them, uncheck the results of the data.
Press the OK button.
NOTE. Command Results can be used again to add additional limits of outcomes using other functions. To prevent the replacement of the existing results, detect the flag from the current outcome.
As a result, we obtain the table shown in Fig. 70C Final graphs. In addition, in the left part of the table we obtain a special structure.
Excel features many ready-made styles of tables that can be used to quickly format the table. If you do not suit existing styles, you can create and apply your own table style. Although you can delete only custom styles, you can cancel any style of the table so that it is no longer applied to it.
Formatting tables can be additionally configured by specifying express styles options for table elements, such as strings headlovkov and total, first and last columns alternating string and columnas well as parameters autofiltra.
Note: Screenshots in this article are obtained in Excel 2016. If you use another version, the interface may differ slightly, but the functions will be the same.
Table style selection
If the book has a data range that is not formatted as a table, Excel automatically converts it to the table when you select it style. You can also change the format of the existing table by selecting another option.

Notes:
Creating and deleting custom table style
Important:
After creating custom table styles, they will be available in the "Table Styles" collections ("Custom").
Created custom styles are available only in the current book.
Creating a custom table style

Deleting custom table style
Select the cells of the table for which you want to delete a custom style.
On the tab the main Choose Format as a table Or expand the collection Styles of tables On the tab Working with tables > Constructor Tables).
In a group Additionally Right-click the style you want to delete, and then in the context menu, select the command Delete.
Note: All tables of the current book using this style will be displayed in the default format.
Cancel style table
Select the table cells for which you want to cancel the current style.
On the tab the main Choose Format as a table Or expand the collection Styles of tables On the tab Working with tables > Constructor (on Mac computers - on the tab Tables).
Select a parameter Clear.
The table will be displayed in the default format.
Note: When canceling the style of the table itself, the table is not deleted. If you do not need to work with data as with a table, it can be converted to a regular range. For more information, see the Excel Table Conversion article in the data range.

In Excel Online, you can apply the table style settings to format the table elements.
Selecting parameters for formatting table items
For tables, you can enable and disable various parameters associated with style. To do this, follow the steps below.
On the tab Designer tables in a group Style Parametersinstall or uncheck the flags for the elements below.
Select table cells.
additional information
You can always ask a question by Excel Tech Community, ask for help in the Answers Community community, as well as offer a new feature or improvement on the website.