Button form dispatcher in access. Creating the main button form
In this lesson, the user will learn what possibilities of creating forms the mode offers. Constructor, will see how to add controls to a form, and will also see how to create a main button form that allows you to merge forms from different tables together.
Topic: Technologies for information retrieval and storage
Lesson: Creating the Main Button Form and Controls
In the previous lesson, we examined the mode of working with forms. Layout... There is another mode for working with forms, it is called Constructor... In this mode, we can place additional elements on the form, the so-called controls or elements of dialog boxes. These are elements we know well: buttons, lists, combo boxes. We can create all these elements in the mode Constructor.
As soon as we enter the mode Constructor forms, a tab immediately appears on the ribbon Constructor, and on it we will see all the controls available to us (Fig. 1). It is these elements that we can place on forms.
Figure: 1
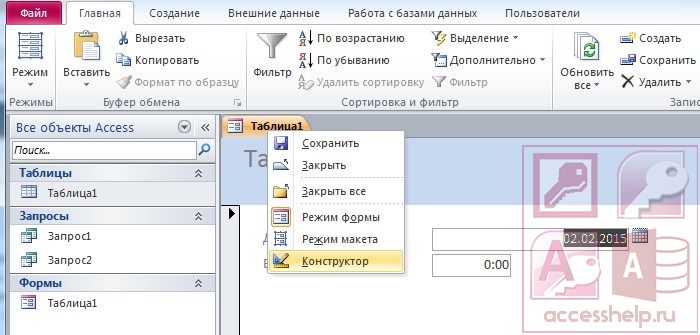
Let's see how we can add these elements to the form in practice. To do this, go to constructor mode (Fig. 2), then the Constructor tab will automatically appear on the ribbon, and we will see all the available elements (Fig. 1).
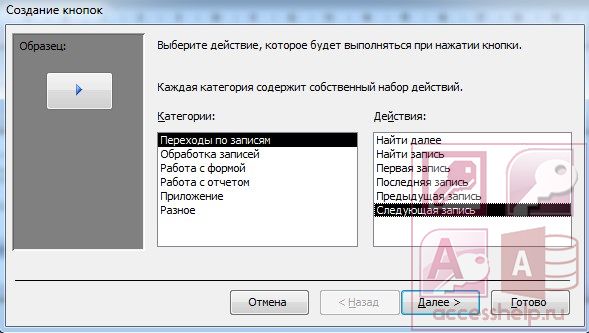
Let's select an element button (Fig. 3), right-click on it and mark the dimensions of the future button on the form (Fig. 4). A dialog box for creating buttons will automatically appear, where we can select a category and an action (Fig. 5). For example, find an entry and click Next. We can place either text on the button, or the corresponding standard image or an icon for the review (Fig. 6). Click further and we will see that the next step is to set the name of the button, and then click Finish (Figure 7). The button has appeared, we can correct the size and go to the mode The form in order to see how the button will be reflected on the form, and to try out its action (Fig. 8). Let's click on it; yes, indeed, as it should, a window appeared Find and replace (fig. 9). Let the surname Blok be a model, let the search be carried out in the category "museums-apartments of St. Petersburg", the match - with any part of the field and all records are viewed (Fig. 10). Let's click further, the button really works correctly, and the information we need in the table is found (Fig. 11).
Figure: 2

Figure: 3

Figure: 4

Figure: five

Figure: 6

Figure: 7

Figure: 8

Figure: nine

Figure: ten

Figure: eleven
In addition to command buttons, lists can also be placed on the form. Selecting from the list provides a quicker jump to the desired entry. Let's see how a drop-down list can be created on a form.
Let's create another control on the form, switch to the mode Constructor and select the control Combo box (fig. 12), let's designate its location and dimensions (fig. 13). This will bring up a dialog box Create combo boxes, in which we can choose how the combo box will receive the value, select, for example, the third option and click next (Fig. 14). Let's select a field Name and click Next (Figure 15) and Finish. But we see that the name of the field already existed, it turned out to be an overlay, but we can simply delete the second name. Let's go to the mode The formto try out the list. The list opens, we choose a name a.S. Pushkin (Fig. 16) and we see that there is a transition to her picture (Fig. 17). That is, the combo box works.

Figure: 12

Figure: thirteen

Figure: fourteen

Figure: fifteen

Figure: sixteen

Figure: 17
If the database contains not one table, but several and, accordingly, several forms, then you can create main button formcontaining buttons, and by clicking on the buttons we can load one form or another.
Let's take a look at the steps involved in creating the main button form.
If the database contains several tables and the corresponding number of forms, then it makes sense to create a main button form, which will serve as a kind of splash screen for the database, in which all other forms can be loaded. Click on the ribbon tab Working with databases (Fig. 18), select the command button dispatcher there, and the following message is displayed: Can't find a button form in this databaseso we press the button Create a (fig. 19). A dialog box will appear Button Form Managerin which we can select the command Edit, a window will appear Changing the page of a button form... Let's create the first button on it (Fig. 20). Let the text of this button be apartment museums and the command will be executed Open the form for modificationand the form is ... Let's create another button, which we'll call writers, on click will also execute the command Open the form for modification and the form writers (fig. 21). Close the open dialog boxes, and we will see in the list of objects that new forms and their corresponding tables have appeared (Fig. 22).
Let's open a button form. By default, it has this design (Fig. 23), there are two buttons on it, when you click on the first button, you go to the form museums-apartments of St. Petersburg, by clicking on the second we will open the form writers, that is, the button form works correctly. Now let's try to change its standard design, go to the mode Constructor, and we will see the properties window here. Thus, we can select any of the elements and change, for example, the background color (Fig. 24). And then we can place, for example, an image (Fig. 25). To do this, select an arbitrary image on our computer and switch to the mode The form... Now our main button form has taken the following form (Fig. 26). You may not necessarily have an image of a computer, but the picture that you selected in the previous step. We can note that our design has changed for the better.

Figure: eighteen

Figure: 19

Figure: 20

Figure: 21

Figure: 22

Figure: 23

Figure: 24

Figure: 25

Figure: 26
Bibliography
- Ugrinovich N.D. Informatics-9. - M .: BINOM. Knowledge Laboratory, 2012.
- Gein A.G., Yunerman N.A. Informatics-9. - M .: Education, 2012.
- Solovyova L.F. Informatics and ICT. Textbook for grade 9. - SPb .: BHV-Petersburg, 2007.
- Lessons-tva.info ().
- Office.microsoft.com ().
- Lessons-tva.info ().
Homework
- What modes of operation does the Form object support?
- How to add controls to a form in MS Access?
- What is a Master Button Form?
- Is it possible to visually edit forms?
Button formis a form whose sole purpose is to redirect you to other forms (usually when the form button is clicked). It is sort of the main menu of your database. This form is both the starting point and the center of action. A typical button form contains a set of buttons that guide you in variousplaces.
In fig. 14.10 shows a variation of a button form that Access creates.
Note
The button shape you create is similar to any other type of shape, so once you've created it, you can use the skills you learned in the last two chapters to give your button shape a visual appeal.
Figure: 14.10. This Access Button Form gives you one-click access to five different forms. Dignity of push-button access forms is the ability to build your own version in a matter of seconds. Disadvantages include somewhat old-fashioned appearanceforcing impressionable users to design their own button forms from scratch
To automatically create a button form, use the Form wizard. The following describes how it works.
1. Select on the ribbon Working with Databases\u003e Working with Databases\u003e Button Form Manager(Database Tools > Database Tools > Switchboard Manager).
The first time you click this button in the database, Access will inform you that it cannot find the button form and will offer to create one. Click the Yes button to continue the operation of the Button Forms Manager (Fig. 14.11).
If the button form already exists, go to step 2, where you can edit the current button form.

Figure: 14.11.The Button Form Manager displays a list of pages. Each page is a separate part of the button form menu. The simplest button forms have only one page, which means that the form maintains one level of depth and each button performs a useful action (for example, opening a form or report)

Figure: 14.12.The window allows you to create menu commands, delete those that are no longer needed, change their order (this order determines the order of commands on the button form)
2. Click the button Editto edit the button form page.
A window appears on the screen Changing the page of a button form(fig.14.12). This is where the real menu commands are defined.
3. To create a new menu command, click the button Create.
The window is displayed Modifying a button form element(fig.14.13). To create a menu command, you need to provide two pieces of information: the text that appears on the form and the command that Access must execute when you click the button.

Figure: 14.13.This command runs the report Attendance(attendance).
From the dropdown list Commandselect the action to be performed by the command
4. Enter the text for the menu and then select the action for the button.
The following options are possible:
o Go to button form(Go to Switchboard) - goes to another page of the button form. Button form pages can be used to break really long menus into several shorter ones:
o Open form for adding(Open Form in Add Mode) - opens the form in data entry mode, so you can insert new records;
o Open the form for modification(Open Form in Edit Mode) - opens the form in normal mode for viewing and editing records. This mode does not permit editing of the form, contrary to the misleading name;
o Open report(Open Report) - opens the report in preview mode;
o Application constructor(Design Application) - Opens the Button Form Manager window, thus allowing editing of the button form menu. This option rarely needs to be included in the menu;
o Quit the application(Exit Application) - exits the Access program:
o Run Macro(Run Macro) and Run the program(Run Code) - run the macro you created (see chapter 15)or the code you wrote in Visual Basic (see chapter 16).
5. Repeat steps 3 and 4 until you have created all the required commands. Then click the button Closeto return to the main window of the Button Forms Manager.
Button forms have a nasty secret. Only eight menu commands can be placed on each page. If you need more (and who doesn't?), You should add additional pages to your menu.
Hello! In this article I will show you how to create a button in microsoft base Access.
The creation of buttons on the form is independent of which version of Access you have installed (2003, 2007, 2010, 2013, or 2016). In this article, I will show you 2 ways to create buttons on a form in the Acceess database: using a wizard and using a macro.
How to do it?
Step 1. Create the form
If you don't have a form, you need to create one. You can see in more detail how the forms are created. Go to the "Create" tab, the "Form Wizard" item. Next, select a table or query on the basis of which the form will be created. Next, select the required fields and click "Next".
Choosing the appearance of the form.

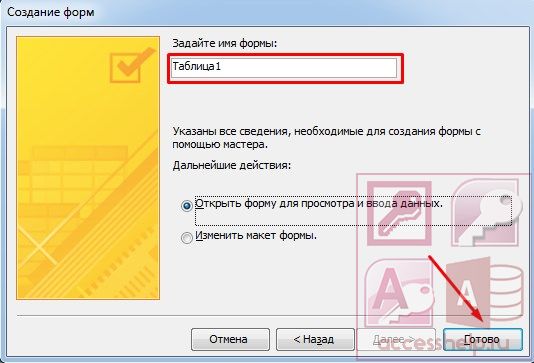
Set the name of the form and click "Finish".
Open the form in design mode. How to create a button in the database Microsoft Access will be described in the second step.
Step 2. Create a button using the wizard
On the toolbar, select the "Button" item and place it on the form. The Button Wizard window appears. Here you need to select the required category and set a specific action. Select "Previous entry" and click "Next".

Choose what is displayed on the button: text or image. We leave the picture by default and click "Next".

Give the button a name and click Finish.


Now let's create a button with text. Let's go to the master of buttons again, select "Next entry".


Step 3. Creating a button using a macro
On the toolbar, select the "Button" item and place it on the form. The Button Wizard window appears. Click "Cancel".


Double click on the created button to open the properties window. Go to the tab "Events" item "Pressing the button". Press the button with three dots.

Select "Macros", click OK.


Usually a special form is created to work with an application, which is called the Main Switchboard and contains buttons that allow you to select the main functions or subsystems of the application. You can create such a form as usual using the Form Designer, or you can use a special wizard called the Swithboard Manager. The Main Switchboard is created in the Northwind database without a wizard. Let's see how to create a similar form using the Button Form Manager.
Select a menu command Service, UtilitiesButton Forms Manager (Tools, Database Utilities, Swithboard Manager).
Since the database does not contain button forms (at least those known to the wizard), a dialog box is displayed asking if you want to create a button form. Click the Yes button.
The wizard now creates the Switchboard Items table and the Switchboard, which we will look at later. After that, a dialog box appears with a list of button-form pages (Fig. 14.15).
Figure: 14.15. Dialog window Button Form Manager
This window lists all pages of the button form (there may be several of them). So far, only one page has been created, and we see it in the list. To create the necessary buttons on it, click the button Edit (Edit). The (Edit Switchboard Page) dialog box (Fig. 14.16) opens, containing a list of form elements.

Figure: 14.16. Dialog window Changing the page of a button form
In this window, you can add, modify and delete elements of the selected page of the form. You can also change the order of their placement on the page (using the buttons Down (Move down) and Up (Move up)).
In field Button form name (Swithboard Name) we can change the default name if needed. The list of form elements is still empty and only one button is available Create a (New). To create the first item, click this button. The (Edit Switchboard Item) dialog box appears (Figure 14.17).

Figure: 14.17.
In field Text (Text) enter the name of the created button, for example Products. Second field Command (Command) allows you to define the action that will be "performed after clicking this button. The list of these actions is shown in Fig. 14.17. There are 8 of them. This can be opening a form in the mode of adding records or editing, opening a report, launching a macro or VPA procedure, launching the wizard for editing a button form, switching to another button form, and exiting the application. Open the form for change (Open Form in Edit Mode). Then in the next field you need to enter the name of the form "List of goods" (Products) (Fig. 14.18) and click OK.
Comment
The name of the last field in the form in Fig. 14.18 changes depending on the selected team in the second field. If the action selected in the list does not require an argument, the third field disappears altogether.

Figure: 14.18. Dialog window
Similarly, add buttons for other objects in the application: "Types" (Categories), "Suppliers" (Suppliers), "Orders" (Orders). Let's create a button Reports, which will open the "Sales Reports Dialog" form and the exit button Exit. Close the dialog Changing the page of a button form (Edit Switchboard Page) by clicking Close (Close).
The number of buttons on one page of the form is limited to 8. This does not mean that you cannot create more of them, you just have to do it manually. However, there is another way to overcome this limitation. If the number of actions that you would like to place on buttons exceeds 8, you can group some actions on a separate page of the button form. As an example, let's create another page of our button form and place buttons for actions with clients on it. To do this, in the dialog box Button Form Manager (Switchboard Manager) click Create a (New). In the dialog box that appears (Fig. 14.19) enter the name of the new page Clients and press the button OK.

Figure: 14.19.
Next, in the page editor, create the elements in a known way: Customers, Customer Stickers, Customer Phones, Customer Orders, which open the corresponding forms. Don't forget to create a button that will return you to the Main Switchboard. To do this, you need to associate a command with it Go to button form (Go to Switchboard) (fig. 14.20). Close this window to return to dialog box Button Form Manager (Switchboard Manager). You should have two pages in the page list.
Now you need to edit the first page - add an element to it, with which you can go to the second page. To do this, select the (Main Switchboard) page in the list and press the button Edit (Edit). In the page editor window, add a new Clients element, also using the command Go to button form (Go to Switchboard).

Figure: 14.20.
Now both pages were linked. You can close the wizard window and see what we got by opening the "Switchboard" form. A window should appear similar to the one shown in Fig. 14.21.

Figure: 14.21.
You can check how the buttons work. For example, if you press the button Clients, the content of the form will change and you will see the second page of the form. The form does not look very attractive, but now you can switch to Design mode and style its appearance using all the means of Design.
Opening this form in Design mode, you will not see its elements, the form seems completely empty. However, if you open the module associated with this form, you will see a lot of code that organizes the form as it should. And for this, information is used that is stored in a special table, which we mentioned at the beginning of the section: Switchboard Items (Button form elements). You will see this table in the list Tables (Tables) windows Database (Database). In this case, it will look something like the one shown in Fig. 14.22.

Figure: 14.22. Table "Elements of a button form"
The first column contains the page ID, the second contains the item number on the page. This number determines the order in which the elements will be positioned on the page. The third column contains the text that appears to the right of the button. The last two columns define the command associated with the item: the command code (as we recall, there are 8 of them) and its argument. Code 0 corresponds to a special element that sets the title of the page and defines its beginning.
Thus, using the Switchboard Manager, you can create a hierarchical system of button form pages that can be an alternative to the usual hierarchical menu. However, unlike the menu, this form is not constantly visible on the screen; it can be hidden by other forms. If you want to provide the ability for the user to open multiple forms and reports at once, you will have to make a button on the toolbar that would allow you to display the Main Switchboard at any time.
The main button form is created for the purpose of navigating through the database, i.e. it can be used as the main database menu. Elements of the main button form are objects of forms and reports.
Queries and tables are not part of the main button form. Therefore, you can use macros to create Query or Tables buttons on a button form. First, "Open Query" or "Open Table" macros with unique names are created in the database window, and then buttons for calling these macros are created in the button form.
Multiple button forms can be created for one database. Buttons should be grouped on the button form pages in such a way that it is clear to the user in which button forms certain commands (queries, reports, data entry and editing) can be executed. It should be noted that on subordinate button forms, return buttons must be placed in the main button form.
The technology for creating button forms is as follows:
1) create a page of the main button form (GKF);
2) create the required number of pages of subordinate button forms (for example, forms for data entry, for reports, for requests, etc.);
3) create elements of the main button form;
4) create elements for push-button forms of reports and forms for entering or changing data;
5) create macros for queries or for tables with unique names;
6) create elements for button request forms or tables.
The structure of button forms can be presented as follows.
To create the main button form and its elements, you need to open the database (for example, "Grade_ of students") and execute the command Access Options - Settings - Select commands from / Database Tools tab - select Button Form Manager and add to Quick Launch Settings.

If the button form has not been created before, a dialog window will open "Manager of button forms",

in which you must click the "Yes" button, thereby confirming the creation of the button form. This will create a Main Button Form page.

Then you can create three more pages of the button form: Data entry forms, Reports and Queries. To do this, click on the "Create" button and in the window that appears, enter the name of the new page "Data entry forms"

and click on the "OK" button. The page of the button form "Data entry form" will be created. Similarly, you need to create two more pages, as a result we will get four pages of button forms, which are displayed in the "Manager of button forms" window.

After that, we create the elements of the GKF, for this, in the "Window Manager of Button Forms" select the page "Main Button Form" and click "Change", a new window "Change the Pages of the Button Form" will open.

In this window, click on the "New" button, a new window "Change an element of a button form" will open,

in which we do the following:
enter the text: Forms for data entry;
select the command from the drop-down list: Go to the button form;
select the button form from the list: Enter data into forms, click on the "OK" button.
In the "Change the page of a button form" window, an element of the button form "Forms for data entry" will be displayed.

In a similar way, you need to create the elements: "Queries" and "Reports", and then the element (button) "Exit from the database".

As a result, all the elements of the main button form will be displayed in the "Change the page of a button form" window.

The button form appears in the list in the Database window area on the Forms tab in the Objects pane, and the Switchboard Items table appears on the Tables tab in lists. Double-clicking on the "Button Form" label will open the Main Button Form.

In order for this form to be displayed when starting the database, you must execute the Access Options / Current Database command, in the View Form window select "Button Form" from the drop-down list, you must uncheck the Status bar box. You can also enter a title and app icon.
This completes the creation of button forms, since there are no elements on subordinate button forms (Data entry forms, Reports, Queries).

Create subordinate button forms: reports and forms
To create elements of the "Data Entry Form" button form, you need to start the database (for example, "Student Progress" with the main button form) and execute the Service / Utilities / Button Forms Manager command.
The Button Form Manager window opens. Then you need to select "Data Entry Forms" in the "Button Forms Manager"

and click on the Change button, the dialog box "Change the page of the button form" will open.


in which we execute:
enter the text: Students;
select the command from the drop-down list: Open the form for modification;
select the button form from the list: Students, click on the "OK" button.
The "Students" item will be displayed in the "Edit Button Form Page" window. After creating the element "Groups of students" using the same technology, it will also be displayed in the window.

Next, you need to create a button to return to the main button form, for this we click on the "Create" button and in the window that appears, select the command "Go to the button form", select "Main button form" and enter "Go to the main button form". Click on the "OK" button

and close the "Change the button form page" window.
Let's start the main button form in the database window, in which we click on the "Data entry forms" button, the "Data entry forms" will open.

Creation of elements for the "Reports" button form is carried out using the same technology, as a result we get.

Creating a subordinate button form: requests
To create elements of the "Queries" subordinate button form, you need to start the database (for example, "Student_Achievement" with the main button form) and create macros "Open Query" or "Open Table" with unique names, and then create buttons in the button form to call these macros.
When creating a macro "Student performance", select the "Macros" tab and click on the "New" icon, the "Macro" dialog box will open. In this window, from the drop-down list, select the "Open Query" action and from the drop-down list select the query name "Student Performance"

then click the "Close" button. In the appeared window "Save changes to the layout or structure of the Macro1 object?" click the "Yes" button. The "Save" window will open, in which you must specify the name of the macro "Student performance" and click on the "OK" button.

The name of the macro will be saved in the list of macros in the database window. After creating and saving the "Parametric_query" macro, the names of the created macros will be displayed in the database window.

To create the elements of the "Student progress" request button form, you must execute the Service / Utilities / Button Form Manager command. The Button Form Manager opens.

Then you need to select "Requests" in the "Button Forms Manager" window and click on the Change button to open the "Change Button Form Page" dialog box.

In this window, click on the "New" button, a new window "Change the button form page" will open,

in which we execute:
enter the text: Report: Student progress;
select the command from the dropdown list: Run macro;
select from the list the button form: Student progress, click on the "OK" button.
In the "Change the page of the button form" window, an element of the button form "Report: Student progress" will be displayed. After creating the "Parametric_query" element using the same technology, it will also be displayed in the window.

Next, close the "Change the button form page" and "Button form manager" windows. In the database window on the "Forms" tab, click on the "Button form" label, the Main button form will open. In the Main Button Form, click on the Requests button, the "Requests" button form will open.

Thus, the "Requests" button form is created, which is a subordinate button form.


