System applications android 5.1. What applications can i uninstall on android? Convert regular applications to system applications with Link2SD utility
Very often, manufacturers of Android smartphones equip their firmware with a lot of software that users will never need. At the same time, such software takes up a sufficient amount of memory on the internal storage and cannot be moved to the card. Moreover, all these programs "hang" in RAM and "eat up" a significant part of the RAM and CPU performance. Today we will talk about how to deal with it and teach you how to remove system applications on Android.
It is necessary to remove unnecessary applications (for example, maps, the launcher itself, music, cloud, Facebook, Google movies, YouTube, etc.) carefully. The fact is that some of them are needed for the system to work, and if they are removed, its functionality will be disrupted. For example, if we uninstall the standard browser and don't install a third-party browser, then when we try to access the Internet, the OS will give an error.
Moreover, if you uninstall, for example, the wireless connection service (and this can be done easily), Wi-Fi or Bluetooth will simply stop working and can only be restored with firmware. The list of required components can be continued for a long time.
Therefore, before proceeding with uninstallation, be sure to make sure that the program is not needed for the OS to work and its absence will not harm it. Also pay attention to the tips of the uninstallers themselves.
Ways to remove and disable system software
So, let's go directly to work on standard programs in your phone or tablet. You can do it the most different ways, both with the use of third-party software (in most cases), and regular means. You should be aware that all of these options, except one (does not remove all programs), require Root rights. You can get them in different ways depending on the firmware (Android 2, 3, 4, 5.1, 6.0, 7, 8) and the smartphone model. The KingRoot program often helps.
Root privileges are administrator privileges in Android that allow you to modify the files of the firmware itself.
Shutdown by standard means
This method is the simplest and works without Root rights. However, it also has disadvantages. The fact is that not all programs can be disabled. Let's take a look at how it works:
- Pull down the notification bar of your device and go to its settings. This is usually a gear icon.

- Scroll down the window and find the settings item named "Applications".

- Next, select the application you want to disable.

- If this program supports shutdown function, you will see the corresponding button. Just click it.

- Next, in the pop-up menu, select the item marked in the screenshot.

- Programs that are disabled in this way are not deleted: they simply stop until you start them yourself.

Attention! If you disable the standard software using the described method, the updates that were installed on it will be automatically deleted.
Uninstall System Applications
Next, we move on to using a third-party software... The first application on our list will be "Uninstall System Applications". You can download it in the Play Store, which is what we will actually do now.
- Go to the Android application store and write the name of the program in the search bar. As soon as the desired result appears in the search results, click on it.

- Install the program by tapping on the button marked in the screenshot.

- We allow access to location, work with multimedia, Wi-Fi and other functions.

- The download of the program we need will begin. Since its size is small, it doesn't take long.

- So, the download is complete, so let's go directly to work with the application.

- At the first launch, we need to provide the very Root rights that were mentioned in the introductory part of the article. Click the button marked in the screenshot.

- A list of all applications will open, including system applications. Check the boxes that you want to delete and press the button marked with the number "2".

- We will be warned that we have highlighted applications that are important for the operation of the system. Think three times if you see such a message. In our case, everything is correct, so click "Yes".

- The removal process will complete in a matter of moments.

Done. The program will disappear from your smartphone at the same moment.
Consider another option, which, if anything, differs from the first, so only appearance... We will also download the program from the Play Market.
- We start to write the name of the utility in the search bar of the store from Google and, as soon as our program appears in the search results, we tap on it.

- Next, press the familiar green button.

- Allow Easy Uninstaller all required permissions.

- We are waiting for 5 MB to download from the network and install on our Android.

- Go to the home screen and see here new label in the form of a trash can. This is what we need.

- In the list of programs available for removal, mark one or more items and press the button marked with the number "2".

- Once again we confirm our intentions by clicking on "OK".

That's all. The app or apps will silently disappear so as not to burden our phone anymore.
CCleaner
Here's another interesting option. Surely, few of you knew that the well-known program for cleaning the disk and phone storage is capable of removing pre-installed applications. However, this is the case. Below we will show you how it works.
- In the same way as in previous cases, we are looking for an application in the Play Market.

- Install it by pressing a familiar button.

- We are waiting for the download of all the files necessary for CCleaner to work.

- We start our cleaner. Today it will act as an uninstaller.

- So, when the program opens, go to its main menu. To do this, press the button with the image of three horizontal stripes (marked in the screenshot below).

- In the menu that has slid out from the left side, click on the "Application Manager" item.

- A list of installed and system software will open. To start the removal procedure, click the trash can icon.

- And again we are warned that if we thoughtlessly "demolish" the standard software, we can easily "kill" our operating system, which, unlike a computer, is not so easy to fix. If you understand this, you can continue. Click the button circled in the picture.

- We mark the programs or games to be uninstalled and tap on the "Delete" button (marked with the number "2").

After that, the program, game or their combination will be removed from Android.
Through the file manager
This deletion option unnecessary applications from Android is different from the ones above. Here we will do everything ourselves, while the previously described uninstaller programs worked in automatic mode. So let's get started.
- We will be using one of the best file managers. This is ES Explorer. Let's download it using Google play.

- We press the button with the inscription "Install".

- We allow the application all types of access that it needs to work properly.

- The program is being downloaded. Since it "weighs" a little more than 10 MB, it will not take much of your time.

The application is installed and ready to work. Next, we'll look at how to remove standard programs... Run the tool.

- Open the ES Explorer main menu. We marked it in the picture below.

- Now we need to allow our file manager to work with components. operating system... To do this, enable the "Root Explorer" function using the trigger marked in the screenshot.

- Naturally, in this case we need to provide the program with Root-rights.

- When access to the firmware files is allowed, we return to main screen ES Explorer and go to the menu.

- Next, we need to go to the "Device" directory. This is our file system, and not the file system of the drive, but the system disk or firmware.

- So, to uninstall the same app, you need to erase files from multiple locations. Let's visit the first one first. Go to the "system" directory.

- Then open the "app" folder.

- On Android 5 and up, you will see application folders. They contain APK files. In earlier versions of the operating system, they will be here without directories. One way or another, we need to delete the selected application with or without a folder. To do this, click on the object and hold it until the button marked with the number "2" appears.

We confirm our action by clicking on "OK".

So, we have cleared the first way, we pass to the second.
- We return to the root directory of the firmware and go to "data".

- Then we open the "app" directory and "demolish" all traces of the unnecessary program here.

- Go to "data" again.

- Go to the directory marked in the picture below and delete the data of the unnecessary program from here.

That's all. The method is one of the most difficult and dangerous for the OS. We recommend using it only for people who are well versed in the topic.
We are smoothly moving on to another option for removing pre-installed Android applications. This time it will be another utility called Root Uninstaller. Let's consider how to work with it.
- In the old fashioned way, go to the Play Store and enter the name of the instrument in the search bar. When the desired object appears in the search results, tap on its icon.
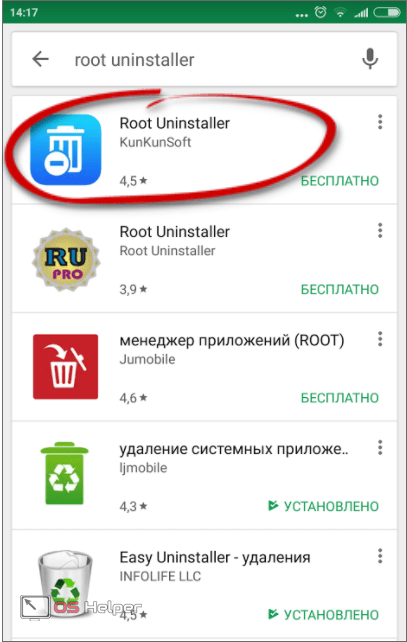
- Click the button marked in the screenshot.

- We are waiting for the installation of all the necessary files to finish.

- Go to the home screen or menu and select the application you just downloaded.

- As in other cases, we need to provide access to the operating system files. Otherwise, nothing will come of it.

- When the program opens, we will see a list of all third-party and standard applications, as well as, if any, games. Tap on the one to be deleted.

- An additional menu will open with several options.
Designation of various buttons:
- Freezing. Application or game is blocked: it does not occupy rAM and do not load the processor. However, the disk space is not released and the program is not removed;
- Delete. The application is completely removed from Android;
- Backup. A backup copy is created, which in case of failures will help to correct the situation and restore what you deleted;
- Reset. The software is cleared of all updates and data received during operation.
There is also a number of additional functions not very important to us.

- As soon as we click the delete button, a warning will follow in which we will need to confirm the action taken. In order to do this, click "OK".

Attention! For the safety of data and guarantee the stable operation of the system, be sure to use the backup tools before uninstalling each program!
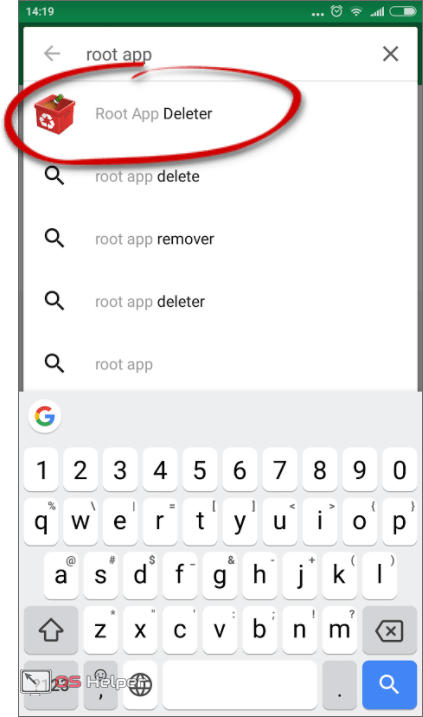
From the name of this program, it is clear that it needs superuser permissions to work, although they are required for our entire list. So, let's take a closer look at how to work with Root App Deleter.
- The first thing we need to do is download the application to the phone. To do this, we will use the Google Play store. Enter the name of the program in the search field and select the desired result from the search results.
- On the Root App Deleter home page, click the familiar button labeled "Install".

- The program "weighs" only 700 kilobytes. This is very small, especially when compared to the competition.

- So, the list of uninstallers has been supplemented with a red icon, click on it.

- There are several tiles in the main menu of our application. We will work with the uninstaller. Click on the item marked in the screenshot.

- Next, we will be asked to choose one of the modes for removing programs. It may be a beginner in which a backup copy of the existing software is automatically created before uninstallation. There is also an expert mode, in which programs are deleted immediately and irrevocably. We choose the algorithm that suits you.

- As a result, a list of programs available for removal will appear. We will uninstall the most unnecessary of them. At least in our opinion. Click on the application name.

- Since this is a beginner mode, there is no delete button, but there is a shutdown. This way we can test the system's operation and, if everything goes well, remove the software completely in expert mode.

- As in other cases, you cannot do without Ruth-rights. We tap on "Provide".

Done. The program is disabled and no longer consumes phone resources.
Titanium Backup
The famous backup application is next. Among other things, the tool can remove any software, and if there is SuperUser, even the system one. So let's figure out how to work with it.
- So, go to Google Play and search there Titanium Backup... The main thing is to find the Root version. Otherwise, nothing will work. See screenshot attached below.

- Then, as in other cases, press the button indicated in the screenshot.

- We are waiting for the download of a small file to finish.

- And launch our Titanium Backup by tapping on its icon on the home screen.

- At startup, the program will ask for access to the firmware files - we provide it.

- And here a small obstacle awaits us. The fact is that for normal operation of Titanium Backup, you need to enable USB debugging in the phone. Do not be alarmed - there is nothing difficult about it. Initially, click "OK".

- Next, we move on to the settings of our device.

- Scroll down the list and select the "About phone" item.

- Next, you need to start quickly tapping on the item "Build number". In our case, there is a non-standard add-on over Android - MIUI, so here we click on its version.

After that, an additional item called "For Developers" will appear in your settings.

We just need to switch the trigger marked in the screenshot to the active position.

Now you can continue with the instructions on how to remove useless system applications from Android via Titanium Backup.
- Go to the "Backups" tab and click on the program you want to "demolish".

- Here we see several points for working with software. Below is their designation.

- After clicking the uninstall button, we will be warned one last time that we have not backed up the program and that if we uninstall the system software, the operating system may crash. Despite everything we press "YES", we advise you to create a backup after all.

A little earlier, we removed standard applications from the system using the same program. However, now another tool will be used, which is also in the ES Explorer functionality. It works as follows:
- Launch ES Explorer from the icon on the desktop or in the application menu.

- On the main screen, tap on the marked icon.
- Select the application you want to remove.

- Click the "Uninstall" button.

Root rights are not required in this case, since the system remembered ES Explorer after the first granting of rights.
- The uninstallation will start, which looks exactly like a standard Android uninstall.

That's all - the program or game has been removed.
There is also an option to remove built-in applications using a PC using the Debloater program, but this does not always work and is rather complicated. It is better to use one of the methods described above.
Summary and comments
So, now the question of how to uninstall factory applications on Android is fully disclosed for you. We've provided a ton of methods, one of which will definitely work. It is important before any action be sure to perform backupto restore data later if necessary. You can also not delete, but disable the software in order to check the functionality of the system without it.
One way or another, if something does not work out and you still have questions, describe the situation in the comments, and we will certainly try to help.
Video
Also, for greater clarity and completeness of the picture, we suggest watching a training video on this topic.
If you have just started to master the Android OS and are already thinking about making your own changes, for example, making the application a system one on Android, then you've come to the right place.
Now we will figure out how to embed a custom application in Android and make it a system one. But first, let's figure out why you need to embed programs:
- Creation of custom firmware.
- Replacing an external launcher
- Replacing the built-in less functional applications with more advanced ones.
- Free up memory to install other programs
In order to embed the program in Android you will need.
Convert regular applications to system applications with Link2SD utility
This method is very convenient, since it does not require much effort from you, all this is done in a few clicks:

- Install Link2SD on your smartphone from Google Play.
- Run the Link2SD program and grant root access.
- Select the program you want to integrate into the Android system
- After that, click in the upper right corner on the three dots, in the window that opens, click "Convert to system".
- Next, restart your device.
In order to make sure that the application is integrated into the system, go to settings, open all applications, find the one you integrated, open and see information about the application. Make sure there is no item next to " Delete", if it is not there, then your program has become system.
The standard way to embed an app in Android
 Before embedding an application, you need to know what it consists of:
 - An Android application has a file name and extension: For example drWeb.apk where drWeb \u200b\u200bis the name and apk is the extension.
- Android programs can be easily opened with (WinRAR or 7zip)
- Some applications have "lib" folders (if you are going to open it with an archiver)
 This folder may contain subfolders with the name:
 - Aremeabi
- Aremeabi-v7a
- Mips64
Instructions on how to make an Android application system
There may be slight differences in different android versions
For Android versions 1.5 - 4.4.4
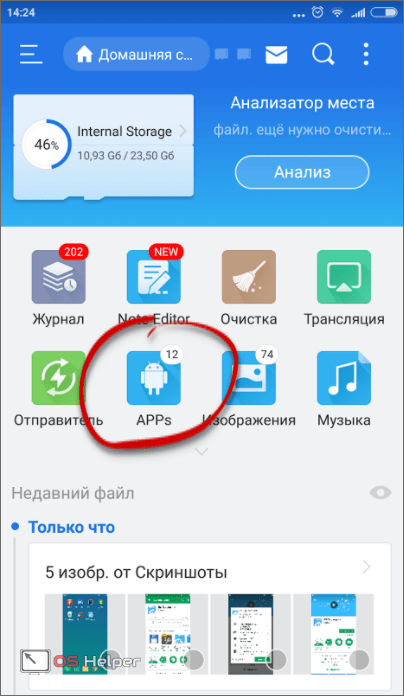
First download file manager Root Browser at Play Market... Open Root Browser give it root rights.
 Programs that are built into the system are located at " /system/app/application.apk".
  Those programs that are installed by the user are located at " /data/app/application.apk".
  Copy the app from " / data / app /"and drag it to the directory" / system / app /"but remember that some applications contain files" * .SO"to be embedded at" / system / lib /".
The second option is to go to " / data / data /" "folder_application_name / lib / file.so"and drag the desired file (s) to" / system / lib /"After this procedure, restart your smartphone.
Instructions for Android 5.0 and higher versions
 Starting with Android 5.0 Lolipop and higher, Google has made changes to the app installation. If on earlier versions of Android apps Apk were located in the same folder XXX.APP, then starting from version 5.0 each separately installed application is installed in its own individual folder with the libs it needs " * .SO"if these are available in the application.
 There is no need to embed any more " * .SO" by the address " / system / lib /"you can just drag the folder with" / data / app / Application_Name" at " / system / app / Application_Name"(System applications are located at" / system / app")
 Go to " / data / app". Find the folder with desired application... Copy the folder with the contents to the system partition " / system / app", then restart your smartphone.
Hello! Alexander Glebov is in touch, in this article I will tell you about which built-in system android apps you can uninstall and how to uninstall system applications on android and clean it from garbage. It often happens that the internal memory of the phone runs out, and you need to clean it somehow, and you have all the applications you need, but there is a lot of junk like: Google Books, Google Music, Google Play Press, etc. The question is, why do we need these applications?
Which built-in android system apps can be removed - warnings
First of all, I want to warn you, deletion system applications can break your phone and it will not turn on, uninstall at your own risk.
Prerequisites
It just so happened that without root you cannot delete system applications rights, there is nothing you can do about it. How to root android for sony smartphones xperia can be read on my blog,. But perhaps the article will help you even if you have a phone from another company.
The procedure is as follows:
I will be showing how to uninstall system apps on android on my phone. I have Sony Xperia ZR, so if yours is the same you will feel better. So, let's begin.

YouTube karaoke module
- Google Lyrics Module
- Wikipedia module
- YouTube module
- POBox Touch
- SkinSelector
- Standard
- Xperia Calendar Sync
- Xperia Social Engine photos
- Xperia with Facebook
- com.sonymobile.faceregistration
- The rest of the applications can be found in the screenshots:
 |
 |
|---|---|
 |
 |
 |
 |
 |
 |
 |
 |
As a result, there will be about 35 applications, and maybe more. After all, you can delete something else, in your opinion, is not necessary. After you have chosen, click the "Delete" button. After clicking, you may need to grant super user rights again, and an informational message will appear that there are selected applications, the removal of which is not desirable. Click "Yes".
After removing the programs, restart the phone. And we pass to the second stage. Cleaning android from garbage left after uninstalling system applications:

As a result of these simple actions, I freed about 600 MB. internal memory... A very good result, especially when every megabyte of free space is important. As usual, ask your questions in the comments. I hope the article was helpful.
Best regards, Alexander Glebov.
The user-visible part of Android consists of programs. Interface, function to send files via bluetooth, gallery or system settings - individual applications that form the operating system. At the same time, some applications are useless or not used, therefore, they can be removed. What programs and applications can be removed and not harm the android system, we will tell you in this article.
What are system apps
System or built-in applications for android are usually called programs installed by the manufacturer mobile device or firmware. Applications are located in the system partition, analogous to the "C" drive in Windows. In this case, the section is not available for the user to view or change without root rights.
Conditional built-in applications for Android are divided into five categories:
- Systemic - required for the operation of the entire Android operating system.
- Service - provide the operation of SMS, Bluetooth, etc.
- Service - applications from Google and from the manufacturer of the mobile device (Samsung, Xiaomi, etc.).
- Custom - social networks, browsers, calculator, etc.
- Operator's - applications from your mobile operator.

Let's consider each of the named categories of programs built into an android phone or tablet in more detail. Which of these built-in applications can be removed and what are the risks of damaging the device.
System Applications
System applications are used for the normal functioning of the OS. These programs include "user interface" and "system settings". Removing system applications on android leads to a violation of the stability and functioning of the OS.
Utilities
TO utilities includes auxiliary applications necessary to provide basic functionality: add / remove programs, SMS, Bluetooth, etc. Removing applications from this category does not crash the OS, but it restricts access to some functions or modules of the device.
Service Applications
Service applications include manufacturer and Google service applications. Manufacturer programs provide additional features, exclusive or general. are used for normal functioning account, the Google Play store and other programs from the search giant. Removing services often affects the limitation of data synchronization and the operation of some applications.
Custom utilities
User utilities provide access to various functions: access to the Internet, access to an account in social network, camera, etc. Removal does not affect the performance of the system, the basic functionality is only partially limited, unless you install an alternative utility - browser, player, etc.
Operator programs
Operator application package is embedded in devices distributed by operators cellular communication, for example the USA. Such programs are aimed at simplifying the interaction of the user with the operator, but are completely useless in other countries when using a different operator. Removing such applications does not in any way affect the operation of the device and system.
Why uninstall system apps
The more applications the manufacturer builds in, the richer and more functional the system turns out, for example MIUI. At the same time, it is more difficult for the user to navigate the settings or menu, which contains a significant number of programs.
Mobile electronics owners use apps in different ways. Some programs are not used throughout the entire "life cycle" of an android smartphone. Therefore, it is better to remove or freeze such programs. Since such applications take up storage space and RAM.
Which applications can be removed
Without impairing the functionality of the smartphone, it is recommended to delete only operator programs. Custom programs can be removed when there is an alternative, for example music player or a browser, third-party calendar or calculator. Or when the program is not in use, for example, the tablet is used only for games, and you do not plan to send SMS or use the camera.
Care should be taken when removing service applications... Since it is worth deleting one random service, the other related programs will stop working. It is rational to delete it in cases when you do not plan to use Google programs and are ready to use an alternative.
Service and system applications for android better not to deleteif you have no idea what the application is responsible for.
List of unnecessary applications
Due to the wide variety of Android smartphones, it is difficult to compile a general list of unnecessary applications. Since the names of some services and programs differ within lineup one manufacturer. The number of applications is also different.
Use the program, subject to availability. System applications are displayed in red. Programs installed by the user are marked in white. Yellow and green are not responsible services.

Start not by deleting, but better frozen programs that are in the main menu. Freeze or uninstall applications that you are not using. Previously, in order to restore programs in case of system malfunction. More about.
Android SDK provides many tools for working with the system. Including it allows you to get a list of applications that are installed on the device. This can be useful when you need to get information about third-party applications (APK size, application path, package name, etc.). For example, in our applications, retrieving a list containing third-party applications plays a large role: GreenBro uses this list to display information about the applications and perform various actions.
In the System Application Manager and APK Extractor, the application list is required to remove applications and extract APK from applications, respectively.
In this article, we will look at how you can get a list of applications installed on a device, as well as how applications are installed on a device.
PackageManager class
PackageManager provides an API that actually manages the installation, uninstallation and updating of applications. When we install an APK file, PackageManager parses that APK and outputs the result.
You can get an instance of the PackageManager class using the method getPackageManager ()... PackageManager provides methods for querying installed packages and corresponding permissions.
Where are stored aPK files on Android?
Depending on the data type, files on Androiid can be stored in the following locations:
- Pre-installed and system applications (Camera, Browser, etc.) are stored in / system / app /
- User-installed apps are stored in / data / app /
- PackageManager creates a directory / data / data /<имя пакета>/ for storing database, preference files, native libraries and cache.
How does PackageManager store application information?
The package manager stores information about the application in three fileslocated in / data / system.
packages.xml
This XML file contains the list of permissions and packages \\ applications. It stores two things: permissions and a package. For instance:
Permissions are stored in a tag
Tag
The subtags are as follows:
packages.list
It is a simple text file containing the package name, user id, flags and directory data.
Com.android.launcher 10013 0 /data/data/com.android.launcher com.android.quicksearchbox 10033 0 /data/data/com.android.quicksearchbox com.android.contacts 10001 0 /data/data/com.android. contacts com.android.inputmethod.latin 10006 0 /data/data/com.android.inputmethod.latin
package-stopped.xml
This file contains a list of packages that have been stopped. Stopped applications cannot receive broadcast messages.
We get a list of applications
Consider getting a list of installed applications using an example GreenBro.
When the application starts, it starts AsyncTaskinside which we get an instance PackageManager and then copy to the list List
Final PackageManager pm \u003d context.getPackageManager (); List
Method getInstalledApplications () takes a flag as a parameter GET_META_DATAwhich determines that we need the metadata for each package.
The result is a list of ApplicationInfo objects for each installed application... ApplicationInfo class provides detailed information about the package, gathered from the tag
Therefore, in a loop, we check each object from the resulting list and write the data to our own class AppInfoto be used later on the main thread.
For (ApplicationInfo appInfo: packages) (PackageInfo packageInfo; try (packageInfo \u003d pm.getPackageInfo (appInfo.packageName, 0); File file \u003d new File (appInfo.publicSourceDir); String size \u003d formatFileSize (context, file.length ()); AppInfo newApp \u003d new AppInfo (applicationLabel (context, appInfo), appInfo.packageName, appInfo.sourceDir, appInfo.publicSourceDir, packageInfo.versionName, packageInfo.versionCode, isSystemPackage (packageInfo), size, file.length (), appInfo.dataDir appInfo.nativeLibraryDir, file.lastModified (), packageInfo.firstInstallTime, packageInfo.lastUpdateTime, appInfo.enabled); apps.add (newApp); publishProgress (newApp); ) catch (PackageManager.NameNotFoundException e) (e.printStackTrace ();))
Here using the method getPackageInfo () of the PackageManager class, we get general information about the application by the given package name. This information is then combined with information received from getInstalledApplications () and is stored in an AppInfo object with the following fields:
- title - application name
- packageName - the name of the package
- sourceDir - full path to the APK of the application
- publicSourceDir - path to the public parts of sourceDir
- versionName - version name
- isSystem - Determines if the application is system
- size - application size (in a convenient form)
- longSize - application size in long
- dataDir - full path to the data directory
- nativeLibraryDir - path to native libraries
- modified - date of the last change
- firstInstallTime - installation date
- lastUpdateTime - date of the last update
- enabled - determines if the application is enabled
You can also use the PackageManager to find out the name of the application, as shown below.
Private String applicationLabel (Context con, ApplicationInfo packageInfo) (PackageManager p \u003d con.getPackageManager (); return p.getApplicationLabel (packageInfo) .toString ();)
Checking whether the application is a system application is also quite simple and is shown below.
Private boolean isSystemPackage (PackageInfo pkgInfo) (return ((pkgInfo.applicationInfo.flags & ApplicationInfo.FLAG_SYSTEM)! \u003d 0);)
At the end of the work, AsyncTask returns the result back to the main thread. That's all, we have downloaded a list of all applications installed on the device and can continue to work with it.


