How to download files from virtualbox. Virtual Machine Import and Export in VirtualBox
VirtualBox is one of the most popular free virtual machine software. With its help, you can experiment with programs and the operating system in a safe environment without fear of harming the system of a real computer. Unfortunately, VirtualBox has one drawback, transferring files between a real computer and a virtual machine is poorly implemented and in many cases simply does not work. You can find instructions on the net that describe how to configure VirtualBox for file transfer, but they are also not always working and are usually very difficult to understand.
In this article, we will analyze the simplest way to transfer files from a real computer to a VirtualBox virtual machine. In this tutorial, we will use a local area network. And in order to configure this local network as quickly, simply and reliably as possible, it is best to use the "Network Bridge" mode. In this mode, the virtual machine connects to your home LAN and becomes part of it. This allows you to easily access from the virtual machine to open network folders that are stored on real computers.
If the real computer has a network folder with full access (write access), this will allow you to upload files from the virtual machine to it. Thus, an open network folder can act as a buffer between a real computer and a virtual machine.
Step # 0. Share the folder on a local network on a real computer.
Before you start configuring the virtual machine, you need to make sure that the real computer has a network folder with shared access and write permission. If there is no such folder, then it must be created. Here we will not consider the process of opening access to a folder, since this is a topic for a separate article. You can read about how this is done in the article "" or in the article "".
Step # 1. Go to the settings of the virtual machine and enable the "Network Bridge" mode.
First, you need to open the VirtualBox program, right-click on the virtual machine to which you want to transfer files, and select the "Settings" option.
In the settings of the virtual machine, go to the "Network" section and change the type of network connection to "Network Bridge".

After that we save the settings by clicking on the "OK" button.
Step # 2. Launch the virtual machine and complete the local network configuration.

After loading the operating system, a window will appear prompting you to select the type of local network. At this stage, select "Home network", this will reduce the likelihood of problems when transferring files from a real computer to a virtual machine.

After that Windows may ask you to restart the system. If such a window appears, then reboot the virtual machine (via).
Step number 3. Check the operation of the local network between the virtual machine and the real PC.
After rebooting the virtual machine, it should become part of your home LAN and file transfer should already work. You can check this by opening the network connection information window in the virtual machine. If everything is configured correctly, then the VirtualBox machine should get an IP address from the range of your home network.

You can also try to execute the ping command, checking access from the virtual machine to the real one.

If everything is ok, then the ping should go through.
Step 4. Open the network folders of the real computer from the virtual machine.
If no problems are identified, then you can open network folders, access to which is open on a real computer. To do this, open the "My Computer" window in the virtual machine and enter the IP address of the real machine in the address bar (in the format as in the screenshot below).

After that, you should be able to access the network folders on your real machine.

Also your real computer should appear in Network Neighborhood in a virtual machine.

After gaining access to the network folders, transferring files from the VirtualBox virtual machine to the real computer and back shouldn't be a problem. You simply copy the files you want to a network folder and access them on both machines.
25765One of the key tasks that users who have installed MS DOS on a virtual machine will have to solve is file sharing. VirtualBox, for example, has a great feature for connecting shared folders, but it won't do much good in this case. As you know, to mount shared folders, it is necessary to install the guest OS add-on package, but there is no such package for MS DOS, but attempts to mount the NTFS directory will most likely fail.
Nevertheless, it is possible to establish file sharing with the host operating system. In the distant happy times, floppy disks were used to exchange data between computers running DOS. You can also use floppies, but not real ones, but virtual ones. If you open the settings of any virtual machine and go to the tab Carriers, then below, just below the area with disks, you can see several buttons, one of which is responsible for adding new controllers to the media tree.

If you click on it, a pop-up window will appear containing a list of available controllers. There is also a Floppy controller in it, the one that allows you to install floppy disks into a virtual computer. In MS DOS installed on VirtualBox, this virtual disk drive is already present by default. It remains only to create for him floppy disk with files and count the trick. You can use an IMA disk image as such a floppy disk. The IMA format is now considered obsolete, but it used to be as popular as ISO today.

IMA files can contain a physical or virtual disk image with almost any data. There is a special utility called WinImage to create IMA images. It is paid, but if you wish, everyone will be able to find a completely working modified version and, moreover, in Russian. After the IMA image is created, it can be connected to the Floppy controller.


However, it is unlikely that you will be able to transfer large amounts of data using this method. The DOS floppy disks supported by VirtualBox cannot exceed 2.88 MB. Therefore, it is better to use ISO images to transfer files to a virtual MS DOS environment. For example, the unpacked game Quacke from 1996 weighs at least 51 MB and just won't fit on an IMA diskette. But in ISO you can roll up as much data as you like. How to create such an image? There are many programs for creating images of this format, UltraISO is considered one of the best. You can also use utilities such as MagicISO or PowerISO.

Connecting such an image to a virtual machine is performed in the same way as in the case of IMA, only instead of the Floppy controller, you need to select the IDE controller, the one to which the main disk of the virtual machine is connected.

Hello dear reader! If you have ever wondered how to transfer a file from a host machine to a virtual one in Hyper-V, then this article is for you! The fact is that it is not always possible to organize network connectivity between the host and the virtual machine, and sometimes it is not necessary at all. Fortunately, Hyper-V provides an easy way to transfer files directly to virtual machines (both Windows and Linux and others) using PowerShell, and now we will tell you about it.
It is important to note that this functionality became available only in version 3 of PowerShell. So check the version you have installed. To do this, in the PowerShell console, enter the command $ PSVersionTable
Process
So, let's open all the cards at once. To transfer files to guest (virtual) machines, use a command with the following syntax:
Copy-VMFile -Name “Name of the virtual machine” -SourcePath? Path to the \\ file \\ which \\ we want to transfer? -DestinationPath? Path to the \\ folder on the virtual machine \\ where we want \\ to put the file? -CreateFullPath -FileSource Host
The team is based on part Copy-VMFilewhich, in PowerShell terminology, is called a cmdlet (Cmdlet), followed by cmdlet keys that define parameters and rules for command execution. For example, in the example above, using the key -Name we indicate the name of the virtual machine to which we want to copy the file, the path to which we indicate in the key -SoucePath... The directory where we want to place the file on the virtual machine is indicated in the key -DestinationPath... Key -CreateFullPath will create a directory if it doesn't already exist. Well -FileSource Host means that the source from which we transfer the file is the host server.
However, if you run the command at the current stage without first preparing the virtual machine, you will receive the following error:

To avoid this, you must first enable support for Guest Services in the virtual machine settings. To do this, go to the parameters of the virtual machine, then select Integration Services (Integration Services) and check the (Guest Services) box.

Or just enter the command Enable-VMIntegrationService -Name? Guest Service Interface? -VMName "Virtual machine name"
After that, enter the command Copy-VMFiles again, after which it will start copying files from the host to the specified directory on the virtual machine. This method is suitable for files of any size, the only limitation is the disk space used by the virtual machine.
Is this article helpful to you?
Please tell us why?
We are sorry that the article was not useful for you: (Please, if it does not make it difficult, indicate why? We will be very grateful for a detailed answer. Thank you for helping us become better!
Hello friends! Today, for fans of virtual machines, Vladimir has prepared just awesome material!
Hi admin, please tell me how to transfer a VirtualBox virtual machine to a regular computer?
Several months ago, Windows 10 came out and I was afraid to install it directly on my computer, but installed it on a virtual machine, then installed all the programs I needed in the operating system: browsers, free OpenOffice, Skype, and so on, after a while I began to notice that the tenth I liked the Windows and even had the idea to transfer it to a regular computer! Is it possible? I did not find such information on the Internet.
How to transfer a VirtualBox virtual machine to a regular computer. Or how to transfer Windows 10 from a virtual machine to a stationary PC using Vhd2disk
Hello friends! It is possible to transfer a VirtualBox virtual machine to a regular computer, and often such a need arises from system administrators, developers of various software and other computer specialists, as well as an ordinary PC user.
- Note: There is a site created specifically for fans of virtual machines.
For the transfer, you can use a still little known program Vhd2disk - designed specifically for porting virtual operating systems to physical hardware, or in other words - to create an exact copy of a virtual disk VHD on a regular hard disk.
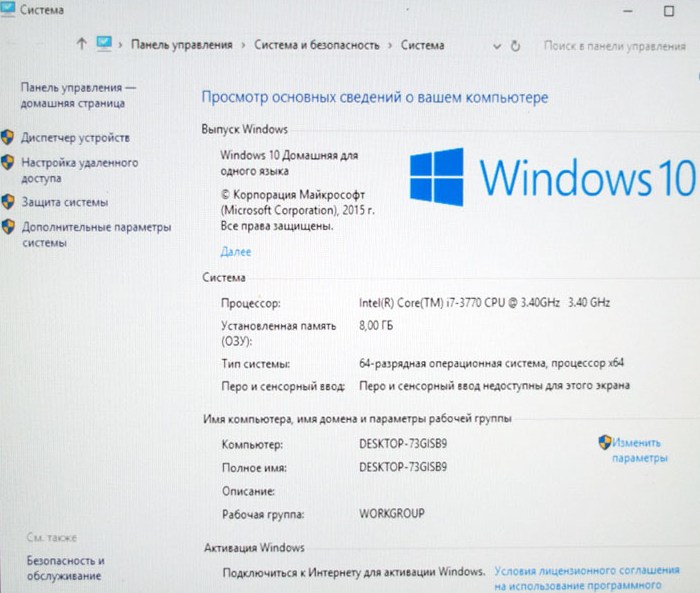
So, we have a VirtualBox virtual machine with Windows 10 installed on it.
Disk management
Disc 0, this is the virtual disk with the installedWindows 10.
When creating the virtual disk, I specified the size of 250 GB. The operating system is installed on disk (C :), and various files are located on disk (E :).

First of all, we convert a VDI virtual disk belonging to a virtual machine to VHD format.

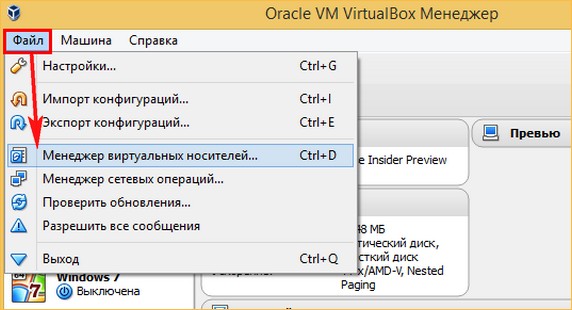
File -->Virtual Media Manager.
Select with the left mouse the VDI virtual disk belonging to the operating system that we want to transfer to a regular computer and click on the button Copy.


We mark the item VHD (Virtual Hard Disk).
Next.

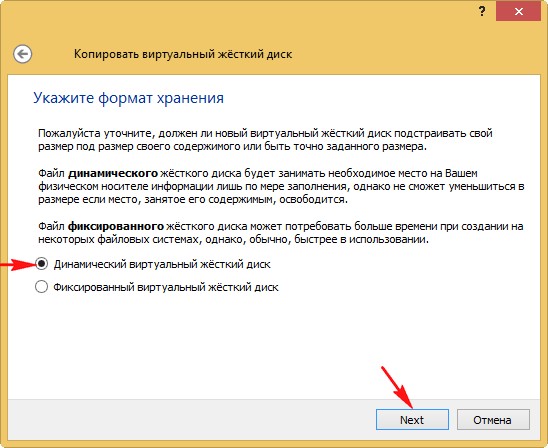
We mark the item Dynamic virtual hard disk.
Next.
Left-click on the explorer button.

We select the location to save the future copy of the virtual hard disk, I will select the disk ( G:) as it has a lot of free space.

Copy.

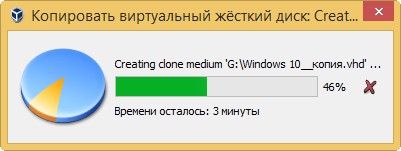
There is a short process of converting the VDI virtual hard disk to VHD format.
At the end of the process, click on the button Close.

On the disk (G :) next to the VDI virtual hard disk, a copy of it appeared, only in VHD format.

Disk management
You need to expand a copy of the virtual disk onto a completely clean physical hard disk without partitions.
Open the Disk Management snap-in.
I will choose Disc 1.
I delete all sections on it.


Vhd2disk
It's time for the Vhd2disk program. Download it on the official website:
https://docs.microsoft.com/en-us/sysinternals/downloads/disk2vhd
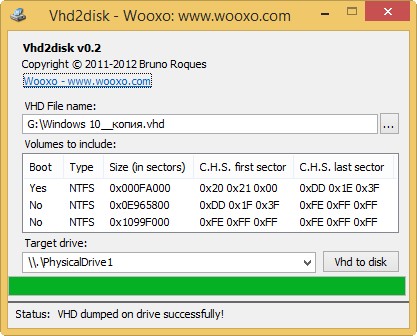
We launch the program. In the main window, left-click on the explorer button.

In the explorer that opens, we find a copy of our virtual disk VHD, select it with the left mouse button and click Open VHD.

In field Target drive we must indicate the serial number of the hard disk to which we will expand the copy of the virtual disk. Click on the arrow.

In the drop-down list, select PhysicalDrive1, since we will expand the contents of the virtual disk VHD on Disc 1.

Click on the button Vhd to disk.


The process of copying the contents of the virtual hard disk VHD to a regular hard disk begins.
The process completed successfully.
Status: VHD dumped on drive successfully!(VHD copied to hard drive successfully!).
Go to Disk Management, click Act-->Refresh.

As you can see, the hard disk (Disk 1) is an exact copy of the virtual hard disk VHD from the virtual machine and installed Windows 10.

Trying to boot into Windows 10.
We reboot the computer and enter the boot menu, select our hard drive (a copy of the virtual VHD with Windows 10).

Preparing devices
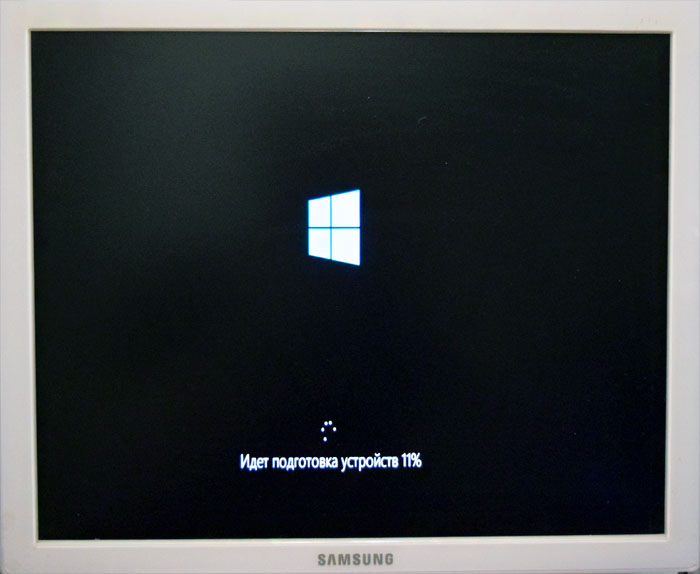
Windows 10 is loaded!

Disk management.


There are several devices without drivers in the task manager, but this is not a problem for us, we install the drivers by software.


